Keto Way of Living
17 Paleo Snacks for Easy Low-Carb Weight Loss

Welcome to our guide on 17 bite-sized low carb paleo snacks for weight loss! If you are looking to shed those extra pounds while still enjoying delicious snacks, you’ve come to the right place. In this article, we’ll introduce you to a variety of mouthwatering snacks that are both low in carbohydrates and aligned with the paleo diet. These snacks will not only satisfy your cravings but also support your weight loss journey.
Key Takeaways:
- Low carb paleo snacks are a healthier choice for weight loss due to their whole, unprocessed ingredients.
- These snacks are packed with protein, healthy fats, and fiber, which keep you feeling fuller for longer.
- Bite-sized snacks are great for portion control and convenient for on-the-go snacking.
- Our list of 17 snacks offers a variety of options, ranging from energy balls to sweet potato chips.
- Incorporating these snacks into your daily routine can support your weight loss goals while keeping your taste buds satisfied.
Why Choose Low Carb Paleo Snacks for Weight Loss?
When it comes to weight loss, finding the right snacks that align with your goals can be challenging. Luckily, low carb and paleo snacks offer a delicious and nutritious solution.
Low carb and paleo snacks are crafted with whole, unprocessed ingredients that are naturally low in carbohydrates. This means that they provide essential nutrients without causing spikes in blood sugar levels. As a result, these snacks are a great choice for individuals looking to shed pounds and maintain a healthy lifestyle.
One of the key reasons why low carb and paleo snacks are ideal for weight loss is their high nutritional value. These snacks are rich in protein, healthy fats, and fiber, making them satisfying and filling. Protein helps to promote satiety, while healthy fats provide long-lasting energy and support optimal bodily functions. Fiber, on the other hand, aids digestion and helps to control appetite.
Unlike traditional snacks that are often loaded with refined sugars and artificial additives, low carb and paleo snacks are free from these harmful ingredients. By opting for these healthier alternatives, you can avoid unnecessary calories and potential weight gain.
Choosing low carb and paleo snacks for weight loss also means indulging in a wide variety of delicious options. From energy balls packed with nut butter and dried fruits to savory zucchini pizza bites, there’s a snack for every palate and craving. You can enjoy the flavors you love while staying on track with your weight loss journey.
So, what are you waiting for? Let’s dive into the world of low carb and paleo snacks and discover the tasty treats that will support your weight loss goals.
Now that we understand the benefits of low carb and paleo snacks for weight loss, let’s explore the top 17 bite-sized options that will keep you satisfied and on track with your dietary goals.
Benefits of Bite-Sized Snacks
Bite-sized snacks offer several benefits for weight loss. Firstly, they allow for portion control, making it easier to manage your calorie intake. When you have a small, bite-sized snack, you can satisfy your cravings without overindulging. It encourages mindful eating and helps prevent mindless snacking, which can sabotage your weight loss efforts.
Secondly, the small size of bite-sized snacks makes them incredibly convenient for on-the-go snacking. Whether you’re heading to work, running errands, or traveling, you can easily pack these snacks in your bag and enjoy them whenever hunger strikes. They provide a quick and satisfying pick-me-up without weighing you down or requiring any preparation.
“Bite-sized snacks allow for portion control, making it easier to manage your calorie intake.”
Lastly, bite-sized snacks can be a fun and satisfying way to indulge in your favorite flavors without overindulging. Instead of depriving yourself of delicious treats, you can enjoy them in smaller, more manageable portions. This can help prevent feelings of restriction and promote a healthier relationship with food.
| Benefits of Bite-Sized Snacks |
|---|
| Portion control |
| Convenience for on-the-go snacking |
| Enjoyment of favorite flavors without overindulging |
By incorporating bite-sized snacks into your weight loss journey, you can enjoy the benefits of portion control, convenience, and guilt-free indulgence. It’s all about finding balance and making sustainable choices that support your health and wellness goals.
Top 17 Bite-Sized Low Carb Paleo Snacks
If you’re looking for delicious and healthy bite-sized snacks that are low in carbs and follow the paleo diet principles, you’ve come to the right place! In this section, we’ve curated a list of the top 17 low carb paleo snacks that are perfect for weight loss. These snacks are not only satisfying to your taste buds but also easy to prepare, helping you stay on track with your diet goals.
1. Almond Butter Energy Balls
Almond Butter Energy Balls are a delicious and nutritious snack option packed with protein and healthy fats. Made with almond butter, dates, and other wholesome ingredients, these energy balls provide a burst of energy to keep you fueled throughout the day.
2. Zucchini Pizza Bites
Satisfy your pizza cravings with these Zucchini Pizza Bites. Using zucchini slices as the base, these low carb snacks are topped with pizza sauce, cheese, and your favorite toppings. These bites are baked to perfection, giving you all the flavors of pizza without the guilt.
3. Coconut Cashew Bars
Coconut Cashew Bars are a delicious combination of coconut and cashews, sweetened with natural ingredients like dates or honey. These bars are easy to make and provide a quick and convenient on-the-go snack option.
4. Baked Sweet Potato Chips
Swap your regular potato chips for these Baked Sweet Potato Chips. Thinly sliced sweet potatoes are baked until crispy, offering a delightful crunch with fewer calories than traditional chips. These chips are a perfect low carb alternative for snacking.
5. Ham and Egg Muffins
Ham and Egg Muffins are a protein-packed snack to kickstart your day. These muffins can be made ahead of time and stored in the fridge, making them a convenient option for a quick and easy breakfast or snack.
6. Cucumber Avocado Bites
Cucumber Avocado Bites are a refreshing and nutritious snack choice. Simply slice cucumbers, top them with mashed avocado, and sprinkle with salt and pepper for a simple yet satisfying low carb paleo snack.
Take a look at the table below for more mouthwatering bite-sized low carb paleo snacks:
| Snack | Description |
|---|---|
| 7. Chicken Lettuce Wraps | These wraps are filled with flavorful seasoned chicken and wrapped in lettuce leaves for a low carb alternative to traditional wraps. |
| 8. Baked Coconut Shrimp | Enjoy the crispy goodness of shrimp coated in coconut and baked to perfection, served with a tangy dipping sauce. |
| 9. Bacon-wrapped Asparagus | Indulge in the rich flavors of bacon-wrapped asparagus spears, roasted to crispy perfection. |
| 10. Mini Cauliflower Pizza Bites | These bite-sized pizza snacks are made with a cauliflower crust, topped with sauce, cheese, and your favorite toppings. |
| 11. Greek Salad Skewers | Skewer tomatoes, cucumbers, olives, and feta cheese for a flavorful and refreshing bite-sized snack. |
| 12. Smoked Salmon Cucumber Roll-Ups | These roll-ups feature thinly sliced cucumbers rolled with cream cheese and smoked salmon. |
| 13. Mini Bell Pepper Nachos | Replace tortilla chips with mini bell peppers topped with your favorite nacho ingredients for a low carb twist on this classic snack. |
| 14. Broccoli Cheddar Bites | Bite-sized broccoli and cheddar cheese make for a flavorful and healthy low carb snack. |
| 15. Cinnamon Apple Chips | Slice apples thinly, sprinkle with cinnamon, and bake until crispy for a delicious and guilt-free snack. |
| 16. Tuna Cucumber Cups | Crisp cucumber cups are filled with a tangy and protein-packed tuna salad. |
| 17. Buffalo Cauliflower Bites | These spicy cauliflower bites are tossed in buffalo sauce and baked until crispy, offering a healthier alternative to buffalo wings. |
1. Almond Butter Energy Balls
Looking for a delicious and healthy snack to keep you energized throughout the day? These almond butter energy balls are the perfect choice! Packed with protein and healthy fats, they provide a satisfying boost of energy that will help you stay focused and alert.
These energy balls are incredibly easy to make and require just a few simple ingredients. Simply combine almond butter, oats, honey, and your favorite mix-ins such as dried fruits, nuts, or chocolate chips. Roll the mixture into bite-sized balls and refrigerate until firm.
Not only are these almond butter energy balls delicious and satisfying, but they also offer numerous health benefits. Almond butter is a great source of healthy fats and protein, which can help keep you feeling full and satisfied. Additionally, it provides essential vitamins and minerals like vitamin E, magnesium, and potassium.
Here’s a breakdown of the nutritional value of almond butter energy balls:
| Nutrition | Per Serving (1 energy ball) |
|---|---|
| Calories | 120 |
| Total Fat | 8g |
| Protein | 4g |
| Carbohydrates | 10g |
| Fiber | 2g |
| Sugar | 4g |
These almond butter energy balls make a convenient and nutritious snack that you can enjoy on the go or whenever you need a quick pick-me-up. Make a batch ahead of time and store them in the fridge for easy access.

Give these almond butter energy balls a try and experience the goodness of a wholesome and delicious snack that will keep you fueled throughout the day!
2. Zucchini Pizza Bites
Looking for a low-carb alternative to satisfy your pizza cravings? Look no further than these delicious zucchini pizza bites. Made with zucchini slices, pizza sauce, cheese, and your favorite toppings, these bites are packed with flavor and perfect for snacking.
Zucchini is a versatile vegetable that adds a nutritious twist to your favorite pizza flavors. It’s low in calories and carbs, making it an excellent choice for those following a low-carb or keto diet.
Here’s how to make these scrumptious zucchini pizza bites:
- 1. Preheat your oven to 400°F (200°C) and line a baking sheet with parchment paper.
- 2. Slice the zucchini into rounds, about 1/4-inch thick.
- 3. Place the zucchini slices on the prepared baking sheet and brush them with olive oil.
- 4. Top each slice with a spoonful of pizza sauce.
- 5. Sprinkle your desired toppings over the sauce. Some popular choices include shredded mozzarella cheese, sliced pepperoni, diced bell peppers, and black olives.
- 6. Bake the zucchini pizza bites in the preheated oven for 12-15 minutes, or until the cheese is melted and bubbly.
- 7. Remove from the oven and let them cool for a few minutes before serving.
These zucchini pizza bites are not only delicious but also a fun way to incorporate more veggies into your diet. They make a great appetizer, snack, or even a light lunch option. Plus, you can customize them with your favorite pizza toppings to suit your taste.
So why not give these zucchini pizza bites a try? They are a tasty and healthier alternative to traditional pizza, perfect for satisfying your cravings without derailing your diet goals.
Stay tuned for the next section where we’ll introduce another mouthwatering low carb paleo snack!
3. Coconut Cashew Bars
Indulge in the delightful flavors of coconut and cashews with these homemade coconut cashew bars. Made from a combination of natural ingredients like dates or honey, these bars offer a deliciously sweet and satisfying snack option. Whether you’re craving a quick bite between meals or need an energy boost on the go, these coconut cashew bars have got you covered.
With their simple recipe and easy preparation, these bars are a convenient option for busy individuals looking for a healthy snack to fuel their day. The combination of coconut and cashews provides a rich source of essential nutrients, including healthy fats, fiber, and protein.
By sweetening the bars with natural ingredients, you can enjoy their delectable taste without the guilt of added sugars. Whether you choose dates or honey as the sweetener, these natural alternatives offer a healthier option and add a touch of sweetness to the bars.
Take a moment to savor the chewy texture and nutty flavors of these coconut cashew bars. You can also customize the recipe by adding your favorite mix-ins, such as chocolate chips or dried fruit, for an extra burst of flavor.
Enjoy the convenience and taste of these homemade coconut cashew bars. They are an excellent snack option for anyone following a low-carb or paleo diet, or for those who simply appreciate a delicious and nutritious treat.

Nutritional Information
| Nutrient | Amount per Serving |
|---|---|
| Calories | 150 |
| Total Fat | 10g |
| Carbohydrates | 12g |
| Protein | 4g |
| Fiber | 2g |
4. Baked Sweet Potato Chips
When it comes to snacking, who can resist the satisfying crunch of a chip? But traditional potato chips can be high in calories and unhealthy fats. That’s where baked sweet potato chips come in. These crispy, flavorful chips are made from thinly sliced sweet potatoes and baked to perfection. Not only are they a delicious alternative to regular potato chips, but they also offer a host of health benefits.
Sweet potatoes are packed with essential nutrients like vitamin A, vitamin C, and fiber, making them a nutritious choice for snacking. They are also lower in calories and have a lower glycemic index compared to regular potatoes, which means they won’t cause a spike in blood sugar levels. Plus, sweet potatoes are naturally sweet, giving these chips a delicious flavor without the need for added sugars or artificial flavors.
Whether you’re looking for a guilt-free snack or a healthier side dish, baked sweet potato chips are the way to go. They are simple to make and can be seasoned with a variety of herbs and spices to suit your taste. So, why not give them a try and satisfy your chip cravings in a wholesome way?
“These baked sweet potato chips are not only tasty but also a great way to incorporate more nutritious ingredients into your diet.” – Nutritionist Sarah Johnson
| Benefits of Baked Sweet Potato Chips: |
|---|
| 1. Rich in vitamins and fiber |
| 2. Lower in calories compared to regular potato chips |
| 3. Naturally sweet flavor |
| 4. Can be customized with various seasonings |
| 5. Suitable for a variety of dietary preferences, including vegan and gluten-free |
5. Ham and Egg Muffins
Looking for a protein-packed snack to jumpstart your day? Try these delicious ham and egg muffins. They are not only incredibly tasty but also easy to make.

These ham and egg muffins can be prepared ahead of time and stored in the fridge, making them a convenient and quick breakfast option for busy mornings. With the perfect balance of ham and eggs, they provide a nutritious and satisfying meal that will keep you energized throughout the day.
Here’s a simple recipe to help you create these flavorful muffins:
- Preheat the oven to 350°F (175°C) and lightly grease a muffin tin.
- In a bowl, whisk together your desired number of eggs with a pinch of salt and pepper.
- Cut slices of ham into small pieces and add them to the greased muffin tin.
- Pour the whisked eggs over the ham, filling each muffin cup about three-quarters full.
- Bake for 15-20 minutes until the eggs are set and lightly golden on top.
- Remove from the oven and let the muffins cool for a few minutes before carefully removing them from the tin.
- Serve warm or store in an airtight container in the refrigerator for up to three days.
These ham and egg muffins are not only delicious but also a great source of high-quality protein that will keep you satisfied until your next meal. Enjoy them as a mid-morning snack, a brunch item, or alongside a fresh salad for a well-rounded lunch.
6. Cucumber Avocado Bites
Looking for a refreshing and nutritious snack option? Try these mouthwatering cucumber avocado bites. Packed with flavor and loaded with health benefits, they are a perfect choice for guilt-free snacking.
To make these delicious bites, start by slicing fresh cucumbers into bite-sized rounds. Place the cucumber slices on a serving platter or a plate.
Next, prepare the avocado topping by mashing ripe avocados in a bowl. Add a sprinkle of salt and pepper to taste, and mix well to combine.
Spoon a dollop of the mashed avocado onto each cucumber slice, ensuring they are evenly coated. Add a pinch of fresh herbs or a squeeze of lemon juice for an extra burst of flavor.
These cucumber avocado bites are not only satisfying but also packed with nutrients. Cucumbers are low in calories and high in hydration, while avocados are a great source of healthy fats and vitamins. Together, they make a winning combination!
Enjoy these bites as a quick snack between meals or serve them as an appetizer at your next gathering. They are a crowd-pleaser and can be customized with additional toppings such as cherry tomatoes, feta cheese, or a drizzle of balsamic glaze.
Try this simple and nutritious recipe for cucumber avocado bites and elevate your snacking game with a burst of freshness!
Benefits of Cucumber Avocado Bites:
- Refreshing and hydrating
- Loaded with vitamins and minerals
- High in healthy fats
- Low in calories
- Customizable with different toppings
| Ingredients: | Instructions: |
|---|---|
| Cucumbers | 1. Slice the cucumbers into rounds. |
| Avocados | 2. Mash the avocados in a bowl and season with salt and pepper. |
| Salt and pepper | 3. Spoon a dollop of mashed avocado onto each cucumber slice. |
| Optional toppings | 4. Add fresh herbs, lemon juice, cherry tomatoes, or feta cheese as desired. |
Conclusion
The 17 bite-sized low carb paleo snacks presented in this article are not only incredibly delicious and satisfying, but they also offer a multitude of benefits for anyone on a weight loss journey. By incorporating these snacks into your daily routine, you can stay on track with your diet goals while enjoying the flavors and textures you love.
These snacks are specially crafted with whole, unprocessed ingredients that are low in carbohydrates, making them a healthy choice for those seeking to shed pounds. Packed with protein, healthy fats, and fiber, these bite-sized treats will keep you feeling full and satisfied between meals, helping to minimize cravings and prevent overeating.
Moreover, these snacks are free from refined sugars and artificial additives, providing a healthier alternative to traditional snacks. By opting for these low carb paleo options, you can nourish your body with quality nutrients and avoid the negative effects of processed foods on your weight and overall well-being.
FAQ
Why should I choose low carb paleo snacks for weight loss?
Low carb and paleo snacks are made with whole, unprocessed ingredients that are low in carbohydrates. They provide a good source of protein, healthy fats, and fiber, which can help keep you feeling full and satisfied between meals. Additionally, they are free from refined sugars and artificial additives, making them a healthier alternative to traditional snacks.
What are the benefits of bite-sized snacks for weight loss?
Bite-sized snacks offer several benefits for weight loss. Firstly, they allow for portion control, making it easier to manage your calorie intake. Secondly, their small size makes them convenient for on-the-go snacking. Lastly, bite-sized snacks can be a fun and satisfying way to indulge in your favorite flavors without overindulging.
How do I make almond butter energy balls?
Almond butter energy balls are easy to make. Simply mix almond butter, oats, honey or maple syrup, and any other desired mix-ins, such as chocolate chips or dried fruit. Roll the mixture into small balls and chill in the fridge until firm.
What are zucchini pizza bites?
Zucchini pizza bites are a low-carb alternative to traditional pizza. They are made by slicing zucchini into rounds, topping them with pizza sauce, cheese, and your favorite toppings, and baking them until the cheese is melted and bubbly.
How do I make coconut cashew bars?
Coconut cashew bars are made by blending cashews, coconut, dates or honey, and a pinch of salt in a food processor until the mixture sticks together. Press the mixture into a baking dish and refrigerate until firm. Cut into bars and enjoy!
What is a healthier alternative to regular potato chips?
Baked sweet potato chips are a healthier alternative to regular potato chips. Simply slice sweet potatoes thinly, toss them with olive oil and your favorite seasonings, and bake in the oven until crispy.
How do I make ham and egg muffins?
Ham and egg muffins are easy to make. Grease a muffin tin and line each cup with a slice of ham. Crack an egg into each ham-lined cup, season with salt and pepper, and bake until the eggs are set.
What are cucumber avocado bites?
Cucumber avocado bites are a refreshing and nutritious snack. Simply slice cucumbers, top each slice with mashed avocado, and sprinkle with salt and pepper for flavor.
No-Bake Raspberry Swirl Cheesecake Bars Recipe

Indulge in the delightful flavors of tangy raspberries and creamy cheesecake with this easy-to-make no-bake raspberry swirl cheesecake bars recipe. Perfect for those who want to satisfy their sweet tooth without the hassle of baking, these bars are a refreshing and delicious treat for any occasion.
Key Takeaways:
- No-bake raspberry swirl cheesecake bars are a delectable dessert option.
- They combine the tanginess of raspberries with the creaminess of cheesecake.
- These bars are perfect for those who want a quick and easy sweet treat.
- The recipe doesn’t require any baking, making it ideal for hot summer days.
- With a buttery graham cracker crust and a swirl of raspberry sauce, these bars are a crowd-pleaser.
Ingredients and Yield
Preparing these mouthwatering no-bake raspberry swirl cheesecake bars requires the following ingredients:
- Fresh or frozen raspberries
- Graham cracker crumbs
- Unsalted butter
- Granulated sugar
- Lemon zest
- Cream cheese
- Sour cream or labneh
- Heavy cream
- Vanilla extract
When combined, these ingredients will yield approximately 10 to 12 delectable servings of raspberry swirl cheesecake bars.
Now that we have all the essential ingredients, let’s dive into the delightful process of creating these irresistible no-bake treats!
Crust Preparation
To create the perfect crust for your no-bake raspberry swirl cheesecake bars, you’ll need to master the art of crust preparation. Starting with a base of graham cracker crumbs, this simple yet delicious crust is a key component of the dessert’s overall texture and flavor.
In a bowl, combine graham cracker crumbs with melted butter, sugar, and a pinch of salt. The butter helps bind the crumbs together, while the sugar adds a touch of sweetness. The pinch of salt enhances the overall balance of flavors.
Once the mixture is well combined, transfer it to a 9-inch springform pan. Use the back of a spoon or your hands to press the crust evenly into the bottom of the pan. Apply a bit of pressure to ensure a firm and compact layer.
After the crust is evenly distributed, place the pan in the refrigerator to chill while you prepare the filling. This step helps the crust firm up and provides a solid foundation for the creamy cheesecake layer.
Now that you’ve mastered crust preparation, it’s time to move on to creating the delicious raspberry sauce that will add a burst of fruity flavor to your no-bake raspberry swirl cheesecake bars.
Raspberry Sauce
In this section, we will learn how to make a delicious and tangy raspberry sauce to complement our no-bake raspberry swirl cheesecake bars. The raspberry sauce adds a burst of fruity flavor and vibrant color to the dessert.
To create the raspberry sauce, you will need:
- 2 cups of fresh or frozen raspberries
- 1/4 cup of sugar
- 1 teaspoon of lemon zest
Follow these simple steps to make the raspberry sauce:
- In a saucepan, combine the raspberries, sugar, and lemon zest.
- Cook the mixture over medium heat, stirring occasionally, until the berries release their juices and the sauce thickens. This process usually takes about 10-15 minutes.
- Once the sauce has thickened, remove the pan from the heat.
- Next, strain the sauce through a fine-mesh sieve to remove the seeds and any lumps, ensuring a smooth and silky texture.
- Allow the raspberry sauce to cool completely, then transfer it to a container and refrigerate until ready to use.
Now that you have prepared the raspberry sauce, it’s time to move on to the next section and learn how to make the creamy cheesecake filling for the bars.
| Ingredients | Quantity |
|---|---|
| Fresh or frozen raspberries | 2 cups |
| Sugar | 1/4 cup |
| Lemon zest | 1 teaspoon |
Cheesecake Filling
The heart of any cheesecake lies in its luscious filling, and this no-bake raspberry swirl cheesecake is no exception. The creamy cheesecake filling is a delightful combination of tangy cream cheese, rich sugar, refreshing lemon zest, and fragrant vanilla extract. The addition of lemon juice and a pinch of salt adds a hint of brightness and enhances the overall flavor profile. To achieve that velvety texture, sour cream or labneh, and cold heavy cream are incorporated into the mixture, resulting in a dreamy and fluffy filling.
“The creamy cheesecake filling is a delightful combination of tangy cream cheese, rich sugar, refreshing lemon zest, and fragrant vanilla extract.”
Assembly and Chilling
Once the crust is prepared, it’s time to assemble the delectable no-bake raspberry swirl cheesecake bars. Begin by filling the crust with the creamy cheesecake mixture, spreading it evenly for a smooth and luscious base.
Next, take dollops of the chilled raspberry sauce and drop them onto the cream cheese mixture. The raspberry sauce adds a burst of tangy flavor and vibrant color to the cheesecake bars.
To achieve that beautiful raspberry swirl effect, use a knife or skewer to gently drag through the dollops of raspberry sauce and cream cheese mixture. The swirling motion creates a visually pleasing pattern of raspberry throughout the cheesecake bars.
Once the raspberry swirl is achieved, cover the cheesecake with plastic wrap or aluminum foil and place it in the refrigerator. Allow the cheesecake to chill for at least 8 hours or overnight to set. Chilling is crucial as it helps the cheesecake bars firm up, making them easier to slice and enjoy.
| Assembly and Chilling | |
|---|---|
| Step 1 | Fill the crust with the cheesecake mixture |
| Step 2 | Add dollops of the chilled raspberry sauce |
| Step 3 | Swirl the raspberry sauce into the cream cheese mixture |
| Step 4 | Cover and chill for at least 8 hours or overnight |
Serving and Unmolding
Once the cheesecake bars are fully chilled and set, it’s time to serve and enjoy this delectable treat. Follow these steps to ensure a perfect presentation:
- Using a spatula or thin knife, loosen the edges of the cheesecake from the sides of the springform pan.
- Remove the springform ring gently.
- Transfer the cheesecake bars to a serving platter or individual plates.
- Serving suggestion: Serve the cheesecake bars cold for the most refreshing experience.
- Optional garnishments: Drizzle additional raspberry sauce over the bars for an extra burst of fruity flavor. Add a few fresh raspberries on top to enhance the presentation.
With their creamy texture, tangy raspberry swirls, and irresistible graham cracker crust, these cheesecake bars are sure to be the highlight of any dessert table. Don’t forget to unmold them carefully for an elegant and visually stunning result.
| Step | Instructions |
|---|---|
| 1 | Using a spatula or thin knife, loosen the edges of the cheesecake from the sides of the springform pan. |
| 2 | Remove the springform ring gently. |
| 3 | Transfer the cheesecake bars to a serving platter or individual plates. |
| 4 | Serving suggestion: Serve the cheesecake bars cold for the most refreshing experience. |
| 5 | Optional garnishments: Drizzle additional raspberry sauce over the bars for an extra burst of fruity flavor. Add a few fresh raspberries on top to enhance the presentation. |
Storage and Shelf Life
Once you’ve enjoyed your delectable no-bake raspberry swirl cheesecake bars, you may be wondering how to store any leftovers and how long they will stay fresh. Proper storage is key to maintaining the quality and flavor of these delicious treats.
To keep your cheesecake bars fresh, it is recommended to store them in an airtight container in the refrigerator. This will help prevent any moisture or odors from affecting the texture and taste. Be sure to place a layer of plastic wrap or parchment paper between the layers to prevent sticking.
When stored properly in the refrigerator, your cheesecake bars can last for up to 3 days. However, it’s important to note that the texture may slightly change over time, becoming softer as the crust absorbs some moisture from the filling. Nevertheless, they will still be a delightful treat to enjoy!
If you find yourself with more cheesecake bars than you can finish within a few days, don’t worry! They can also be wrapped tightly in plastic wrap or aluminum foil and stored in the freezer for up to one month.
When you’re ready to enjoy your frozen cheesecake bars, it is recommended to thaw them in the refrigerator overnight. This gradual thawing ensures that they maintain their texture and flavor as they return to their original state.
Remember, freezing may alter the texture slightly, but they will still be absolutely delicious. So feel free to indulge in one whenever you’re in the mood for a luscious and creamy treat!
Tips for Storage and Shelf Life:
- Store cheesecake bars in an airtight container in the refrigerator.
- Place a layer of plastic wrap or parchment paper between layers to prevent sticking.
- Cheesecake bars can last for up to 3 days in the refrigerator.
- For longer storage, wrap tightly and store in the freezer for up to one month.
- Thaw frozen cheesecake bars gradually in the refrigerator overnight.
Storage and Shelf Life Summary:
| Storage Method | Shelf Life |
|---|---|
| Refrigerator | Up to 3 days |
| Freezer | Up to 1 month |
Variation and Ingredient Substitution
Looking to add some variety to your no-bake raspberry swirl cheesecake bars? No problem! This versatile recipe allows for ingredient substitutions and variations to suit your taste buds. Here are a couple of options:
Berry Substitution
While this recipe features tangy raspberries, you can easily swap them out for other delicious berries. Try using blueberries, strawberries, or blackberries instead. Each berry will bring a unique and delightful flavor to your cheesecake bars.
Crust Alternatives
If you’re in the mood for a different crust flavor, consider swapping out the graham crackers for vanilla sandwich cookies. This simple substitution will give your cheesecake bars a whole new taste experience, without compromising on the creamy and indulgent filling.
| Variation | Ingredient Substitution |
|---|---|
| Berry Variation | Blueberries, strawberries, or blackberries |
| Crust Alternative | Vanilla sandwich cookies instead of graham crackers |
Feel free to get creative and experiment with other variations and substitutions. The possibilities are endless when it comes to customizing these no-bake raspberry swirl cheesecake bars to suit your personal preferences.

With these substitution ideas, you can create a unique twist on this delicious dessert that will impress your family and friends. Enjoy the creamy filling, tangy swirl, and flavorful crust in any way you choose!
Conclusion
In conclusion, these no-bake raspberry swirl cheesecake bars are the perfect dessert for the summer. The tangy raspberry swirl adds a burst of flavor to the creamy cheesecake filling, while the buttery graham cracker crust provides a delightful crunch. Whether you’re hosting a backyard barbecue or simply craving a sweet treat, these cheesecake bars are sure to impress.
One of the best things about this recipe is that it requires no baking, making it a hassle-free dessert option. The preparation is straightforward, and the result is a delicious and visually appealing dessert that is bound to please your family and friends.
To take these cheesecake bars to the next level, top them with fresh raspberries for an extra touch of sweetness. The combination of the raspberries and the creamy cheesecake is truly delightful, creating a dessert that not only tastes amazing but also looks beautiful.
So, if you’re looking for a show-stopping dessert that is easy to make and perfect for the summer season, look no further than these no-bake raspberry swirl cheesecake bars. They are guaranteed to satisfy your sweet tooth and leave you craving more. Enjoy!
FAQ
Can I use frozen raspberries instead of fresh ones?
Yes, you can use frozen raspberries in this recipe. Just make sure to thaw them before cooking the raspberry sauce.
Can I use a different type of berry for the swirl?
Absolutely! Blueberries, strawberries, or blackberries can be used instead of raspberries to create a different flavor combination.
Can I substitute the graham cracker crumbs with something else?
Sure! If you prefer, you can use crushed vanilla sandwich cookies instead of graham cracker crumbs to make the crust.
How long does it take for the cheesecake bars to set?
It is recommended to chill the cheesecake bars for at least 8 hours or overnight to ensure they are fully set before serving.
Can I store the cheesecake bars in the freezer?
Yes, you can wrap the cheesecake bars tightly and store them in the freezer for up to one month. Remember to defrost them in the refrigerator before serving.
How long can I keep the cheesecake bars in the refrigerator?
The cheesecake bars can be stored in an airtight container in the refrigerator for up to 3 days.
What should I serve with the cheesecake bars?
The cheesecake bars are delicious on their own, but you can serve them with additional raspberry sauce and fresh raspberries for extra sweetness and garnishment.
Can I use labneh instead of sour cream in the filling?
Yes, you can substitute labneh for the sour cream in the cheesecake filling. It will provide a slightly tangier flavor.
Can I make these cheesecake bars without using any sugar?
The sugar is an essential ingredient in this recipe to provide sweetness and help with the texture of both the crust and the filling. However, you can try using alternative sweeteners if desired.
How many servings does this recipe yield?
This recipe yields approximately 10 to 12 servings of delicious no-bake raspberry swirl cheesecake bars.
Oven-Baked Pork Chops & Roasted Sweet Potatoesxxx

Welcome to our delicious and easy sheet pan meal featuring oven-baked pork chops and roasted sweet potatoes. This mouthwatering recipe combines tender pork chops seasoned with a flavorful spice rub, cooked alongside caramelized sweet potatoes. It’s a one-pan wonder that will satisfy your cravings and simplify your dinner routine.
Key Takeaways:
- Oven-baked pork chops with roasted sweet potatoes is a convenient sheet pan meal.
- This dish is perfect for busy weeknights, providing a complete and satisfying dinner option.
- The pork chops are seasoned with a flavorful spice rub for added taste.
- Roasting the sweet potatoes brings out their natural sweetness and creates tender, caramelized pieces.
- Leftovers can be stored and reheated for future enjoyment.
The Benefits of Sheet Pan Meals
Sheet pan meals have gained immense popularity for their convenience and simplicity. These one-pan wonders offer a range of benefits, making them a go-to option for easy, healthy, and quick clean-up meals.
One of the key advantages of sheet pan meals is their easy preparation. With minimal effort and preparation time, you can have a delicious and satisfying dinner on the table in no time. Simply toss the ingredients onto a sheet pan, pop it in the oven, and let it do the work for you.
Sheet pan meals also promote healthy eating by incorporating a variety of nutritious ingredients. You can easily pack your meal with a colorful array of vegetables, lean proteins, and wholesome grains. The even heat distribution in the oven ensures that the flavors meld together, resulting in a tasty and well-balanced dish.
Another significant advantage of sheet pan meals is the quick clean-up. By using just one pan, you significantly reduce the number of dishes and utensils to wash. This not only saves time but also makes the post-meal clean-up hassle-free, allowing you to spend more time enjoying your meal and less time in the kitchen.
“Sheet pan meals offer the perfect combination of convenience, taste, and nutrition. They are a game-changer for busy individuals and families seeking easy and healthy dinner solutions.”
One example of a delicious sheet pan meal is the oven-baked pork chops with roasted sweet potatoes. This mouthwatering dish combines the savory flavors of seasoned pork chops with the natural sweetness of roasted sweet potatoes, creating a well-rounded and satisfying meal for all.
Spice Rub for Pork Chops
The spice rub used for the pork chops in this recipe adds a delicious burst of flavor. It combines a variety of aromatic ingredients that perfectly complement the natural flavors of the pork chops, creating a savory and mouthwatering coating. Get ready to tantalize your taste buds with the bold and delightful flavors of this spice rub!
Ingredients
- Coconut sugar
- Paprika
- Chili powder
- Thyme
- Rosemary
- Garlic powder
- Kosher salt
- Pepper
Spice Rub Recipe
“The perfect combination of spices transforms ordinary pork chops into a culinary masterpiece.”
| Ingredient | Measurement |
|---|---|
| Coconut sugar | 1 tablespoon |
| Paprika | 1 teaspoon |
| Chili powder | 1 teaspoon |
| Thyme | 1 teaspoon |
| Rosemary | 1 teaspoon |
| Garlic powder | 1 teaspoon |
| Kosher salt | 1/2 teaspoon |
| Pepper | 1/2 teaspoon |
Directions
- In a small bowl, combine all the ingredients for the spice rub.
- Generously coat both sides of the pork chops with the spice rub, gently pressing it into the meat to ensure maximum flavor.
- Cover the pork chops and let them marinate in the refrigerator for at least 30 minutes, or overnight for even more intense flavor.
Now that your spice rub is ready, it’s time to take your pork chops to the next level. The flavorful combination of spices will infuse every bite with a tantalizing taste that will leave you craving more. Get ready to impress your family and friends with these mouthwatering pork chops!
Roasting Sweet Potatoes
Roasting sweet potatoes is a simple and delicious way to cook them. In this recipe, the diced sweet potatoes are drizzled with olive oil, salt, and pepper, then roasted in the oven at 425°F for 15 minutes. The high heat helps to caramelize the edges, resulting in sweet and tender pieces of sweet potato. Roasting intensifies the natural sweetness and brings out the best flavors in the potatoes, making them a perfect complement to the savory pork chops.
Roasted Sweet Potatoes Recipe
- Preheat your oven to 425°F.
- Peel and dice the sweet potatoes into bite-sized pieces.
- Place the sweet potatoes on a sheet pan, and drizzle with olive oil.
- Season with salt and pepper to taste, and toss to coat evenly.
- Spread the sweet potatoes evenly on the sheet pan.
- Roast in the preheated oven for 15 minutes, or until the edges are caramelized and the sweet potatoes are tender.
- Remove from the oven and let cool slightly before serving.
Roasted sweet potatoes are not only delicious, but they also offer a variety of health benefits. They are rich in fiber, vitamins, and minerals, making them a nutritious addition to your meal. Plus, the caramelized edges and tender texture take the flavor profile of sweet potatoes to a whole new level. Whether you’re enjoying them as a side dish or incorporating them into a sheet pan meal like oven-baked pork chops, roasted sweet potatoes are sure to be a crowd-pleaser.
The high heat of roasting sweet potatoes helps to caramelize the edges, resulting in a sweet and tender texture that perfectly complements the savory pork chops. Plus, roasting intensifies the natural sweetness of the potatoes, enhancing their flavor profile.
Cooking Pork Chops and Apples
After the sweet potatoes have roasted for 15 minutes, it’s time to add the delicious combination of pork chops and apples to the sheet pan. To enhance the flavor, coat the pork chops with the irresistible spice rub and place them on the opposite side of the pan from the sweet potatoes.
The diced apples are then added to the sweet potatoes, creating a harmonious medley of flavors. Everything is roasted for an additional 12-15 minutes, or until the sweet potatoes are tender and the pork chops reach an internal temperature just before 145°F. This cooking time ensures perfectly cooked pork chops and tender apples that beautifully complement the dish.
The pork chops and apples create a delightful combination of savory and sweet flavors that will tantalize your taste buds. The natural sweetness of the apples pairs wonderfully with the savory spice rub, resulting in a dish that is both comforting and satisfying.
Leftover Storage and Reheating
After enjoying a delicious meal of oven-baked pork chops with roasted sweet potatoes, you may find yourself with some leftovers. Don’t let these tasty morsels go to waste! With proper storage and reheating techniques, you can savor the flavors of this dish for days to come.
To ensure the longevity of your leftovers, it’s important to store them in an airtight container. This will help maintain their freshness and prevent any odor or taste transfer to other food items in your refrigerator.
Leftovers can be safely stored in the refrigerator for up to five days. This allows you to enjoy the convenience of a ready-made meal whenever you desire.
When it’s time to reheat your leftovers, you have two options: the oven or the microwave.
Using the Oven: Preheat your oven to 350°F (175°C). Place your portion of oven-baked pork chops with roasted sweet potatoes in a baking dish or on a sheet pan. Cover the dish with aluminum foil to prevent the food from drying out. Heat in the oven until the dish is heated all the way through. This method will help retain the flavors and textures of the original meal.
Using the Microwave: For a quick and convenient reheating option, the microwave is your best friend. Simply transfer your leftovers to a microwave-safe dish and cover it with a microwave-safe lid or plastic wrap. Heat the dish on high power in short intervals, checking on the food and stirring occasionally to ensure even heating. Be cautious not to overheat, as this can result in dry and rubbery pork chops.
Regardless of which method you choose, make sure the dish is heated to a safe internal temperature of 165°F (74°C) to eliminate any bacteria that may have grown during storage.
By properly storing and reheating your leftovers, you can continue to enjoy the mouthwatering flavors of oven-baked pork chops with roasted sweet potatoes. So, go ahead and indulge in this delectable meal even on the following days.
| Reheating Method | Instructions |
|---|---|
| Oven | 1. Preheat oven to 350°F (175°C). 2. Place leftovers in a baking dish or on a sheet pan. 3. Cover with aluminum foil. 4. Heat until dish is heated through. 5. Check the internal temperature to ensure it reaches 165°F (74°C). |
| Microwave | 1. Transfer leftovers to a microwave-safe dish. 2. Cover with a microwave-safe lid or plastic wrap. 3. Heat in short intervals on high power, stirring occasionally. 4. Check the internal temperature to ensure it reaches 165°F (74°C). Be cautious not to overheat. |
Nutritional Information
The oven-baked pork chops with roasted sweet potatoes are not only delicious but also provide essential nutrients. Nutritional information for one serving of this dish is as follows:
| Calories | Carbohydrates | Protein | Fat | Fiber | Sugar |
|---|---|---|---|---|---|
| 478 | 33g | 49.5g | 16g | 5.4g | 13.2g |
The nutritional values provided are approximate and may vary depending on the size and thickness of the pork chops used. However, this well-balanced meal offers a good source of energy and essential nutrients.
The oven-baked pork chops with roasted sweet potatoes provide:
- A moderate calorie count of 478 calories per serving.
- 33 grams of carbohydrates for sustained energy.
- A generous 49.5 grams of protein for muscle repair and growth.
- 16 grams of fat, which includes healthy fats.
- 5.4 grams of fiber, aiding digestion and promoting satiety.
- 13.2 grams of sugar, originating from natural sources.
These nutritional values make the oven-baked pork chops with roasted sweet potatoes a well-rounded and satisfying meal option.
Key Nutritional Facts:
- Calories: 478
- Carbohydrates: 33g
- Protein: 49.5g
- Fat: 16g
- Fiber: 5.4g
- Sugar: 13.2g
Enjoy the nutrient-rich benefits of this delicious meal! Fuel your body with the right balance of calories, carbohydrates, protein, and fat for optimal health.
Paleo Variation
For those following a paleo diet, this recipe can be modified to align with paleo principles. Instead of using regular white potatoes, you can opt for sweet potatoes as they are paleo-friendly. The dish can be customized further by using a cauliflower crust for a paleo pizza variation. This allows for a home-style meal that fits within the paleo guidelines while still providing comfort and satisfaction.
Image: Paleo variation of oven-baked pork chops with roasted sweet potatoes.
Make-Ahead and Freezing Options
This oven-baked pork chops with roasted sweet potatoes recipe offers convenient make-ahead and freezing options to streamline your meal preparation. By taking advantage of these options, you can save time and ensure a delicious and hassle-free dining experience.
Make-Ahead Preparation
Making this sheet pan meal ahead of time allows you to be even more efficient in the kitchen. Here’s how you can do it:
- Prepare the Ingredients: Begin by washing, peeling, and cutting the sweet potatoes into cubes. You can also mix the spice rub and marinate the pork chops a day in advance. Keep the marinated pork chops and prepped sweet potatoes in separate airtight containers in the refrigerator.
- Assembly: When you’re ready to cook, simply arrange the marinated pork chops and prepped sweet potatoes on a sheet pan, following the recipe instructions. This way, the assembly process becomes quicker and more convenient.
- Cooking Time: The cooking time remains the same whether you assemble the dish immediately or do it ahead of time.
By preparing the ingredients ahead of time, you can have a satisfying meal on the table with minimal effort and maximum convenience.
Freezing Options
If you have extra portions or want to make a batch for future meals, freezing is a great option to preserve the flavors and convenience of this dish.
Here’s how you can freeze the oven-baked pork chops with roasted sweet potatoes:
- Cooling: Allow the cooked dish to cool completely before freezing to maintain its integrity and prevent ice crystals from forming.
- Portioning: Divide the dish into individual portions based on your preference. This will make it easier to defrost and reheat smaller portions as needed.
- Freezing: Place each portion in airtight containers or freezer-friendly bags, ensuring all excess air is removed to prevent freezer burn.
- Labeling: Label each container or bag with the dish’s name and date of freezing to ensure you use them within the recommended time frame.
- Storage Duration: According to the USDA, this dish can be frozen for up to 3 months for the best quality.
When you’re ready to enjoy your frozen meal, simply defrost it in the refrigerator overnight and reheat it in the oven or microwave following the instructions in Section 6.
With the make-ahead and freezing options offered by this recipe, you can conveniently plan and prepare delicious meals in advance, saving you time and effort in the kitchen while still enjoying the flavors of oven-baked pork chops and roasted sweet potatoes.

Conclusion
Oven-baked pork chops with roasted sweet potatoes is a versatile and satisfying meal that combines the flavors of tender pork chops, caramelized sweet potatoes, and savory spices. This delicious dish offers the convenience of a sheet pan meal, making it easy to prepare and perfect for busy weeknights. The combination of juicy pork chops and tender sweet potatoes creates a harmonious balance of flavors that will please the whole family.
Not only is this meal delicious, but it also provides a balanced nutritional profile. The oven-baked pork chops are a great source of protein, while the roasted sweet potatoes offer a healthy dose of fiber, vitamins, and minerals. This combination of ingredients ensures that you are nourishing your body with a wholesome and satisfying meal.
Furthermore, oven-baked pork chops with roasted sweet potatoes can be customized to suit different dietary preferences. If you follow a paleo lifestyle, you can easily modify the recipe to align with paleo principles. By using sweet potatoes instead of white potatoes and opting for a cauliflower crust, you can enjoy a paleo-friendly version of this home-style dish.
In conclusion, oven-baked pork chops with roasted sweet potatoes is a flavorful and convenient meal that brings together the best of both worlds. Whether you’re looking for a quick and easy weeknight dinner or a satisfying dish that caters to your dietary needs, this recipe is sure to please. So why not give it a try and treat yourself to the deliciousness of oven-baked pork chops and roasted sweet potatoes!
FAQ
How long does it take to cook oven-baked pork chops with roasted sweet potatoes?
The cooking time for this dish is under 30 minutes, making it a quick and convenient option for busy weeknights.
What spices are used in the spice rub for the pork chops?
The spice rub for the pork chops includes ingredients like coconut sugar, paprika, chili powder, thyme, rosemary, garlic powder, kosher salt, and pepper.
How do you cook the sweet potatoes for this recipe?
The sweet potatoes are diced and roasted in the oven at 425°F for 15 minutes, resulting in sweet and tender pieces with caramelized edges.
How do you cook the pork chops and apples?
The pork chops are coated with the spice rub and placed on the sheet pan, alongside diced apples. Everything is roasted for an additional 12-15 minutes until the sweet potatoes are tender and the pork chops reach the desired temperature.
Can I store and reheat leftovers of this dish?
Yes, you can store leftovers in an airtight container for up to 5 days. To reheat, you can use either the oven or the microwave.
What are the nutritional values of this dish?
One serving of this dish contains approximately 478 calories, 33g of carbohydrates, 49.5g of protein, and 16g of fat. The meal also provides 5.4g of fiber and 13.2g of sugar.
Is this recipe suitable for those following a paleo diet?
Yes, the recipe can be modified to align with paleo principles by using paleo-friendly ingredients like sweet potatoes and cauliflower crust.
Can I make this dish ahead of time or freeze it?
Yes, you can prepare the ingredients ahead of time and marinate the pork chops in advance. The dish can also be frozen for up to 3 months.
What are the benefits of sheet pan meals?
Sheet pan meals offer easy preparation, healthy ingredients, and quick clean-up, making dinner time easier and more enjoyable.
What makes oven-baked pork chops with roasted sweet potatoes a versatile meal?
This dish combines the flavors of tender pork chops, caramelized sweet potatoes, and savory spices. It can be customized to suit different dietary preferences and still provides comfort and satisfaction.
Can you make Keto in a Bread Machine? Guide: Secrets Revealed!

Traditional bread can have negative effects on health, including spiking blood sugar levels and promoting inflammation. However, with the rise of the ketogenic diet, there are now low-carb, grain-free keto bread recipes that can be made in a bread machine. In this article, we will explore the possibility of making keto bread in a bread machine, providing you with a step-by-step guide and revealing the secrets to creating delicious and healthy loaves.
Key Takeaways:
- Traditional bread can have negative effects on health.
- Keto bread is made with low-carb and grain-free ingredients.
- Bread machines provide convenience and ease in the bread-making process.
- Specific ingredients are required for keto bread, such as almond flour and coconut flour.
- Making keto bread in a bread machine is a simple process with the right settings.
The Benefits of Keto Bread and Bread Machines
When it comes to enjoying bread while following a low-carb or ketogenic diet, keto bread is the perfect solution. Made with low-carb and grain-free ingredients, keto bread allows individuals to satisfy their bread cravings without worrying about spiking their blood sugar levels or promoting inflammation. But what makes keto bread and bread machines so beneficial? Let’s take a closer look.
The Benefits of Keto Bread
Keto bread offers a range of advantages for those following a low-carb or ketogenic lifestyle. Here are some key benefits:
- Low-carb and grain-free: Keto bread is made with ingredients that are low in carbohydrates and free from grains, making it a suitable choice for those limiting their carb intake.
- Blood sugar control: Since keto bread is low in carbs, it helps prevent blood sugar spikes, making it a healthier option compared to traditional bread.
- Promotes ketosis: By using ingredients that support ketosis, such as almond flour and coconut flour, keto bread can help individuals maintain a state of ketosis while enjoying bread.
- Reduced inflammation: Traditional bread made with grains can contribute to inflammation in the body, but keto bread made with grain-free ingredients can help reduce inflammation.
Overall, keto bread allows individuals to enjoy the taste and texture of bread while aligning with their low-carb or ketogenic diet goals, offering a healthier alternative to traditional bread options.
The Benefits of Bread Machines
Now that we understand the benefits of keto bread, let’s explore the advantages of using bread machines to make it:
- Convenience: Bread machines provide a convenient and time-saving solution to baking bread. Simply add the ingredients, set the machine, and let it do the work. No need for kneading and shaping by hand.
- Consistent results: Bread machines are designed to mix, knead, and bake bread with precision, ensuring consistent results every time. This is especially beneficial for inexperienced bakers who may struggle with achieving the desired texture and consistency when making bread by hand.
- Versatility: Bread machines are not limited to just making keto bread. They can be used to make a variety of bread recipes, giving users the flexibility to experiment with different flavors and styles.
- Time and energy-saving: With a bread machine, you can save time and energy spent on traditional bread-making methods. Simply set the machine and attend to other tasks while your bread bakes.
By utilizing a bread machine, individuals can enjoy the benefits of keto bread while taking advantage of the convenience and ease of automated bread-making.
With the benefits of keto bread and bread machines in mind, it’s clear that combining them allows for a delightful and satisfying bread-making experience. In the next section, we will dive into the specific ingredients needed to create delicious keto bread and explore how to use a bread machine to achieve the best results.
The Ingredients for Keto Bread
Keto bread is a delicious alternative for those following a low-carb or ketogenic diet. To create the perfect keto bread, it’s essential to use ingredients that are low in carbs and free from grains. These carefully selected ingredients provide the right texture and structure, ensuring that the bread rises properly and offers a satisfying taste and consistency.
The Key Ingredients for Keto Bread
Here are the key ingredients commonly used in keto bread recipes:
- Almond flour: Almond flour is a popular alternative to traditional wheat flour. It is low in carbs and high in healthy fats, making it an excellent choice for keto baking.
- Coconut flour: Coconut flour is another staple ingredient in keto bread recipes. It is not only low in carbs but also high in fiber, which adds to the bread’s overall texture.
- Psyllium husk powder: Psyllium husk powder is often used in keto bread recipes to help bind the ingredients together and create a light and airy texture.
- Eggs: Eggs are a crucial ingredient in keto bread as they provide structure and help the bread rise. They also add moisture and richness to the final product.
- Baking powder: Baking powder is used to leaven the bread, ensuring that it rises properly and has the desired fluffiness.
By combining these low-carb and grain-free ingredients, you can create keto bread that is both delicious and suitable for your dietary needs.
Now that we’ve covered the essential ingredients, let’s move on to the process of making keto bread in a bread machine. Section 4 will guide you through the steps to create your own homemade keto bread.
Using a Bread Machine to Make Keto Bread
Making keto bread with a bread machine is a simple and straightforward process that takes the hassle out of traditional bread-making methods. With a bread machine, you can enjoy homemade keto bread with minimal effort. Here’s a step-by-step guide to creating delicious and healthy keto bread using a bread machine:
- Start by adding the wet ingredients to the bread pan. This typically includes eggs and melted butter or coconut oil. These ingredients provide moisture and help bind the bread together.
- In a separate bowl, combine the dry ingredients. This includes almond flour, coconut flour, and other keto-friendly ingredients that give the bread its texture and flavor.
- Add the dry ingredients to the bread pan, making sure to evenly distribute them.
- Place the bread pan in the bread machine and select the appropriate settings. Most bread machines have a “knead” and a “bake” function, which you’ll need for making keto bread.
- Press start, and let the bread machine work its magic. It will mix, knead, and bake the bread for you, resulting in a perfectly baked loaf of keto bread.
Once the bread machine has finished its cycle, carefully remove the bread pan from the machine and allow the bread to cool before slicing. This will ensure that the bread holds its shape and doesn’t crumble.
Making keto bread with a bread machine is a convenient and time-saving method. It takes the guesswork out of the baking process, allowing you to enjoy consistently delicious and healthy keto bread. Now, you can savor the taste of homemade bread without compromising your low-carb lifestyle.
Tips and Tricks for Perfect Keto Bread
To ensure that your keto bread turns out perfect every time, here are some tips and tricks to keep in mind:
- Use high-quality ingredients: Using high-quality ingredients is key to achieving the best taste and texture in your keto bread. Opt for organic and fresh ingredients whenever possible.
- Follow the recipe instructions closely: Keto bread recipes often require specific measurements and techniques. It’s important to follow the instructions closely to ensure the best results.
- Measure ingredients accurately: Accurate measurements are crucial in keto baking. Use measuring cups and spoons to ensure precision and consistency.
- Don’t overmix the dough: Overmixing the dough can lead to a dense and heavy loaf. Mix the ingredients just until they are combined to avoid overdeveloping the gluten.
- Experiment with flavors and add-ins: Keto bread doesn’t have to be plain and boring. Add flavor by incorporating herbs, spices, cheese, or even nuts and seeds to customize your bread.
- Be patient and let it cool: After baking, resist the temptation to slice into the bread immediately. Allow it to cool completely before slicing to maintain its structure and prevent it from crumbling.
“Using high-quality ingredients and following the recipe instructions closely are essential for creating delicious and healthy keto bread.”
Remember, practice makes perfect. Don’t be discouraged if your first attempt doesn’t turn out exactly as you imagined. With time and experience, you’ll master the art of making keto bread that is both satisfying and delicious.
| Tips | Tricks |
|---|---|
| Use high-quality ingredients | Experiment with flavors and add-ins |
| Follow recipe instructions closely | Be patient and let it cool |
| Measure ingredients accurately | |
| Don’t overmix the dough |
High Altitude Adjustments for Keto Bread
If you live at a high altitude, you may need to make adjustments to the recipe to account for the differences in atmospheric pressure. This can affect the rising and baking process of the bread.
When preparing keto bread at high altitudes, consider the following adjustments:
- Reduce the amount of yeast: High altitude environments may cause bread to rise faster than at lower elevations. To prevent over-rising, reduce the amount of yeast in the recipe.
- Adjust the amount of liquid: Higher altitudes can dry out the dough more quickly. Increase the amount of liquid slightly to ensure proper hydration of the ingredients.
- Alter the baking temperature and time: Due to decreased air pressure, baking times may need to be slightly longer in high altitude areas. Similarly, adjusting the temperature may help prevent the bread from browning too quickly.
It’s important to note that high altitude adjustments can vary depending on your specific location. Experimentation and trial and error may be necessary to find the ideal adjustments for your altitude.
Expert Tip:
If your keto bread still isn’t turning out as desired, try reducing the oven temperature by 25 degrees Fahrenheit and extending the baking time. This can help ensure even baking and a properly cooked loaf.

Adjusting recipes for high altitude baking can be a challenge, but with some practice and experimentation, you can achieve great results. Enjoy your homemade keto bread, tailored to the unique characteristics of your high altitude environment!
Troubleshooting Common Issues with Keto Bread in a Bread Machine
While making keto bread in a bread machine is usually a straightforward process, it’s not uncommon to encounter some common issues along the way. These issues can include bread not rising properly, a dense and heavy texture, or a burnt crust. Don’t worry, though! I’ve got some troubleshooting tips to help you overcome these challenges and achieve perfect keto bread every time.
Issue 1: Bread not rising properly
One common problem with keto bread is that it may not rise as much as regular bread. This could be due to various factors, such as the lack of gluten in the ingredients or lack of sufficient yeast for fermentation. To address this issue, try adjusting the following:
- Check the expiration date of your yeast and make sure it’s fresh.
- Increase the amount of yeast slightly to boost fermentation.
- Give the bread more time to rise by using a longer rise setting on your bread machine.
Issue 2: Dense and heavy texture
If your keto bread turns out dense and heavy instead of light and fluffy, it’s usually a sign that the bread didn’t rise enough or there was not enough structure in the dough. Here are some tips to address this issue:
- Make sure you’re using the right ratio of wet to dry ingredients. Adjust the moisture level by adding a little more liquid or reducing the amount of dry ingredients.
- Include an ingredient like psyllium husk powder, which helps improve the texture and structure of keto bread.
- Try increasing the baking powder or other leavening agents to create more lift and lightness.
Issue 3: Burnt crust
A burnt crust can be disappointing, but fear not, there are ways to prevent it:
Before making any adjustments, check the settings on your bread machine. Some machines come with pre-set crust settings that may need to be adjusted. If the crust is consistently too dark or burnt, try selecting a lighter crust setting.
- Start by reducing the baking time or lowering the temperature slightly to prevent excessive browning.
- If the crust is browning too quickly, cover it with aluminum foil during the baking process to shield it from direct heat.
Remember, troubleshooting keto bread issues may require a bit of experimentation and patience. It’s important to note that each bread machine and recipe may have unique characteristics that affect the final outcome. Keep trying different adjustments until you find the perfect formula for your desired keto bread.
| Issue | Troubleshooting Tips |
|---|---|
| Bread not rising properly |
|
| Dense and heavy texture |
|
| Burnt crust |
|
Other Keto-Friendly Recipes for Bread Machines
In addition to keto bread, there are a variety of other keto-friendly recipes that can be made in a bread machine. These recipes offer a delicious and healthy alternative to traditional baked goods while still adhering to a low-carb and grain-free lifestyle. By using the right ingredients and following simple instructions, you can create an array of tasty treats that will satisfy your cravings without derailing your keto goals.
Here are some keto-friendly recipes for bread machines that you can experiment with:
Keto-Friendly Muffins
Enjoy a moist and fluffy muffin without the guilt. Keto-friendly muffins are made with low-carb ingredients such as almond flour and coconut flour, and sweetened with natural sugar substitutes like erythritol or stevia. From classic blueberry to chocolate chip, the possibilities are endless. These muffins make for a great grab-and-go breakfast or a delightful afternoon snack.
Keto-Friendly Rolls
No meal is complete without a warm and buttery roll. With keto-friendly rolls, you can enjoy the same comforting taste and texture while keeping your carb intake in check. These rolls are typically made with almond flour, eggs, and a touch of psyllium husk powder for added structure. Whether you prefer plain dinner rolls or savory garlic knots, keto-friendly rolls are a great addition to any meal.
Keto-Friendly Cakes
Indulge your sweet tooth with a keto-friendly cake. These delicious treats are made using low-carb ingredients like almond flour or coconut flour, combined with sugar substitutes such as erythritol or monk fruit. From classic vanilla to rich chocolate, keto-friendly cakes offer a guilt-free way to satisfy your dessert cravings. Top it off with a sugar-free frosting or a dollop of keto-friendly whipped cream for the perfect finishing touch.
Experiment with different recipes, flavors, and add-ins to find your favorite keto-friendly creations. The possibilities are endless when it comes to making delicious and healthy baked goods in your bread machine!
| Recipe | Ingredients | Instructions |
|---|---|---|
| Keto-Friendly Muffins | – Almond flour – Coconut flour – Eggs – Erythritol or Stevia – Vanilla extract – Baking powder – Salt – Optional add-ins (e.g., blueberries, chocolate chips) |
1. Preheat the bread machine to the “Baking” setting. 2. In a bowl, whisk together the dry ingredients. 3. In a separate bowl, whisk together the wet ingredients. 4. Pour the wet ingredients into the bread machine’s pan. 5. Add the dry ingredients on top. 6. Close the lid and set the timer according to the bread machine’s instructions. 7. Once the muffins are done baking, remove them from the bread machine and let them cool before serving. |
| Keto-Friendly Rolls | – Almond flour – Coconut flour – Psyllium husk powder – Baking powder – Salt – Eggs – Butter or coconut oil – Optional toppings (e.g., sesame seeds, garlic) |
1. Preheat the bread machine to the “Dough” setting. 2. In a mixing bowl, combine the dry ingredients. 3. In a separate bowl, whisk together the wet ingredients. 4. Pour the wet ingredients into the bread machine’s pan. 5. Add the dry ingredients on top. 6. Close the lid and let the bread machine mix and knead the dough. 7. Once the dough is ready, remove it from the bread machine and shape it into rolls. 8. Place the rolls on a baking sheet and let them rise for a few minutes. 9. Preheat the oven and bake the rolls according to the recipe’s instructions. 10. Remove the rolls from the oven and let them cool before serving. |
| Keto-Friendly Cake | – Almond flour or Coconut flour – Eggs – Sugar substitute (e.g., erythritol, monk fruit) – Baking powder – Salt – Vanilla extract – Optional add-ins (e.g., cocoa powder, berries) |
1. Preheat the bread machine to the “Cake” setting. 2. In a mixing bowl, combine the dry ingredients. 3. In a separate bowl, whisk together the wet ingredients. 4. Pour the wet ingredients into the bread machine’s pan. 5. Add the dry ingredients on top. 6. Close the lid and set the timer according to the bread machine’s instructions. 7. Once the cake is done baking, remove it from the bread machine and let it cool before frosting and serving. |
Storing and Freezing Keto Bread
To preserve the freshness and quality of your keto bread, it’s important to store it properly. Here are some tips for storing and freezing keto bread:
Storing Keto Bread
You can store keto bread in different ways depending on how long you want to keep it:
- At room temperature: Store the bread in an airtight container at room temperature for a few days. This is the best option if you plan to consume the bread within a short period.
- In the refrigerator: If you want to extend the shelf life of your keto bread, store it in the refrigerator. Place the bread in an airtight container or wrap it tightly in plastic wrap to prevent it from drying out. The bread can last up to a week in the refrigerator.
Freezing Keto Bread
If you want to keep your keto bread for an even longer period, freezing is the way to go. Here’s how to freeze keto bread:
- Slice the bread: Before freezing, slice the keto bread into individual slices. This will make it easier to thaw and serve later on.
- Wrap tightly: Wrap each slice of bread tightly in plastic wrap or place them in freezer bags. This will help prevent freezer burn and maintain the quality of the bread.
- Label and date: Label the wrapped slices with the date of freezing. This will help you keep track of how long the bread has been in the freezer.
- Freeze: Place the wrapped slices in the freezer and make sure they are stored flat to prevent them from getting squished or damaged.
When you’re ready to enjoy a slice of frozen keto bread, simply thaw it at room temperature. You can also toast it for a warm and crispy texture.
Note: The texture of keto bread may change slightly after freezing and thawing, but it will still be delicious and suitable for your low-carb lifestyle.
The Future of Keto Bread in Bread Machines
As the popularity of the ketogenic diet and low-carb lifestyles continues to grow, the demand for keto-friendly bread options also increases. People are becoming more conscious of their health and seeking alternatives to traditional bread that align with their dietary goals. This trend has paved the way for the emergence of keto bread, which offers a low-carb and grain-free alternative to satisfy bread cravings.
Keto bread has gained a loyal following among individuals following the ketogenic diet or those looking to reduce their carb intake. It provides the opportunity to enjoy bread without the guilt, as it does not cause a significant spike in blood sugar levels or promote inflammation. With its growing popularity, it is expected that the future of keto bread will bring exciting advancements and innovations to the realm of bread machines and recipes.
Manufacturers are likely to develop specialized bread machines specifically designed for making keto bread. These machines may come equipped with preset programs and functions tailored to the unique requirements of keto bread recipes. This would offer greater convenience and ease in the bread-making process, further enhancing the overall experience for users.
Additionally, the future of keto bread may bring new recipes and techniques that allow home bakers to create even more delicious and healthy keto bread creations. With research and experimentation, innovative combinations of ingredients may be discovered, leading to enhanced flavors and textures. This would further elevate the appeal of keto bread and encourage its incorporation into the daily lives of individuals following the ketogenic diet or seeking a healthier lifestyle.
Together, these advancements and innovations signify a promising future for keto bread in bread machines. The ongoing demand for keto-friendly options, coupled with the commitment of manufacturers and home bakers to cater to this need, will undoubtedly fuel the advancement of keto bread technology. This is an exciting time for those exploring the world of keto baking, as they can expect more convenience, customization options, and delectable creations on their journey to making delicious and healthy keto bread at home.
| Advancements in Keto Bread | Benefits |
|---|---|
| Specialized bread machines for keto bread | – Greater convenience and ease of use |
| New recipes and techniques | – Enhanced flavors and textures |
Conclusion
In conclusion, making keto bread in a bread machine is a viable and rewarding option for those following a low-carb or ketogenic diet. By using the right ingredients and following a reliable recipe, you can create delicious and healthy keto bread that satisfies your cravings without compromising your dietary goals.
The convenience of using a bread machine allows for easy preparation and baking, making the process accessible to both experienced bakers and beginners. With a few adjustments, such as reducing yeast or altering baking times for high-altitude regions, you can achieve excellent results every time.
Whether you’re strictly adhering to a low-carb lifestyle or simply looking for healthier alternatives, keto bread made in a bread machine is a versatile addition to your diet. Enjoy the aroma of freshly baked, homemade keto bread and the satisfaction of knowing you can indulge in delicious bread without breaking your dietary commitments.
FAQ
Can you make keto bread in a bread machine?
Yes, you can make keto bread in a bread machine. By using low-carb and grain-free ingredients, you can create delicious and healthy loaves that are suitable for a low-carb or ketogenic diet.
What are the benefits of keto bread and bread machines?
Keto bread allows you to enjoy bread without spiking blood sugar levels or promoting inflammation. Bread machines provide convenience and ease in the bread-making process, making it easier for even inexperienced bakers to achieve great results.
What ingredients are needed to make keto bread?
Keto bread recipes typically require low-carb and grain-free ingredients such as almond flour, coconut flour, psyllium husk powder, eggs, and baking powder. These ingredients provide the right texture and structure for keto bread.
How do you make keto bread using a bread machine?
To make keto bread in a bread machine, you start by adding wet ingredients to the bread pan, followed by combining the dry ingredients in a separate bowl. Then, you add the dry ingredients to the bread pan and set the machine to the appropriate settings. The machine will mix, knead, and bake the bread.
What are some tips and tricks for perfect keto bread?
Some tips for making perfect keto bread include using high-quality ingredients, following the recipe instructions closely, not overmixing the dough, and allowing the bread to cool completely before slicing.
How do you adjust keto bread recipes for high altitudes?
If you live at a high altitude, you may need to reduce the amount of yeast, adjust the amount of liquid, and alter the baking temperature and time in keto bread recipes to account for the differences in atmospheric pressure.
What are some common issues with keto bread in bread machines?
Common issues with keto bread in bread machines include bread not rising properly, a dense and heavy texture, or a burnt crust. These issues can be troubleshooted by adjusting the ingredients, experimenting with different settings and timing, or using a different recipe.
What other keto-friendly recipes can be made in a bread machine?
In addition to keto bread, you can make keto-friendly muffins, rolls, and cakes in a bread machine. By using low-carb and grain-free ingredients, you can create a variety of delicious and healthy baked goods.
How do you store and freeze keto bread?
You can store keto bread in an airtight container at room temperature for a few days or in the refrigerator for up to a week. To extend the shelf life, you can slice the bread before freezing and wrap individual slices tightly in plastic wrap or place them in freezer bags.
What does the future hold for keto bread in bread machines?
As the popularity of the ketogenic diet and low-carb lifestyles continues to grow, we can expect to see more advancements and innovations in keto bread recipes and bread machines. Manufacturers may develop specialized bread machines specifically designed for keto bread, offering more convenience and customization options.
Keto Zucchini Bread Recipe – Low-Carb Delight

If you’re looking for a delicious and nutritious low-carb treat, look no further than this keto zucchini bread recipe. Made with almond flour and packed with flavor, this bread is the perfect way to satisfy your bread cravings while staying on track with your low-carb diet.
What sets this recipe apart is its versatility. You can customize it by adding walnuts, blueberries, or chocolate chips for extra flavor and texture. Plus, it’s incredibly easy to make with just one bowl and seven simple ingredients.
To ensure your keto zucchini bread turns out perfectly moist, make sure to shred the zucchini and squeeze out the excess liquid. And for those looking for an on-the-go option, you can easily adapt this recipe to make individual keto zucchini bread muffins.
Whether you enjoy it fresh or freeze it for later, this keto zucchini bread is a tasty and satisfying option for anyone following a low-carb lifestyle. Give it a try and indulge in a slice of this low-carb delight today!
Key Takeaways:
- This keto zucchini bread recipe is a low-carb delight made with almond flour.
- You can customize the recipe by adding walnuts, blueberries, or chocolate chips for extra flavor.
- Shred the zucchini and squeeze out the excess liquid to ensure perfectly moist bread.
- It’s incredibly easy to prepare with just one bowl and seven simple ingredients.
- You can adapt the recipe to make individual keto zucchini bread muffins for on-the-go options.
The Versatility of Zucchini in Keto Baking
Zucchini is a versatile ingredient in keto baking, offering a range of possibilities beyond just making zucchini bread. With its mild flavor and impressive nutrient profile, zucchini can be used in various keto recipes to enhance taste, texture, and moisture. By incorporating zucchini into your keto baking repertoire, you can create delicious and healthy dishes while keeping the carb count low.
Explore Exciting Zucchini-Based Keto Recipes
Pasta Noodles: Zucchini can be spiralized and transformed into low-carb pasta noodles that are perfect for satisfying your pasta cravings without the guilt. Try swapping traditional spaghetti with zucchini noodles in your favorite keto pasta recipes.
Taco Shells: Create keto-friendly taco shells by using thinly sliced zucchini as a substitute for tortillas. These zucchini taco shells are not only low in carbs but also add a refreshing crunch to your tacos.
Breads: Zucchini is a key ingredient in popular keto zucchini bread recipes. Its moisture content keeps the bread soft and moist, while imparting a subtly sweet flavor. Enjoy a slice of keto zucchini bread as a delightful treat or a satisfying breakfast option.
Using zucchini in this keto zucchini bread recipe is a great way to enjoy a delicious treat while sticking to your low-carb diet.
The Benefits of Zucchini in Keto Baking
Adding zucchini to your keto baking offers several benefits:
- Low Carb: Zucchini is naturally low in carbs, making it an excellent ingredient for maintaining ketosis on a ketogenic diet.
- Moisture and Nutrients: Zucchini adds moisture to baked goods while providing essential vitamins and minerals, such as vitamin C, vitamin A, and potassium.
- Texture Enhancement: Zucchini contributes to the texture of baked goods, ensuring a soft and tender crumb for keto bread, muffins, and other treats.
The versatility of zucchini in keto baking allows you to indulge in a variety of delicious recipes while staying true to your low-carb lifestyle.
| Recipe | Carb Count | Preparation Time |
|---|---|---|
| Keto Zucchini Bread | 6g net carbs per slice | 1 hour |
| Zucchini Pasta Noodles | 3g net carbs per serving | 30 minutes |
| Zucchini Taco Shells | 2g net carbs per shell | 40 minutes |
Image: A fresh zucchini, representing the versatility of zucchini in keto baking
Easy One-Bowl Preparation
This keto zucchini bread recipe is a breeze to make, requiring only one bowl and seven simple ingredients. With its easy one-bowl preparation, you can have a delicious low-carb snack ready in no time.
Whether you’re new to baking or a seasoned pro, this recipe is perfect for anyone looking for a quick and satisfying treat. The straightforward instructions make it a hassle-free baking experience.
By combining the dry and wet ingredients in a single bowl, you’ll save time on both preparation and cleanup. Just mix everything together, pop it in the oven, and enjoy the delightful aroma of freshly baked bread wafting through your home.
Not only does this easy keto zucchini bread recipe simplify the baking process, but it also delivers incredible flavor and texture. The moistness of the zucchini, combined with the nutty almond flour, creates a mouthwatering loaf that you won’t be able to resist.
So, if you’re craving a delicious and nutritious treat but don’t want to spend hours in the kitchen, give this easy one-bowl keto zucchini bread recipe a try. It’s the perfect solution for those busy days when you need a quick and satisfying snack.
Quote:
“This one-bowl keto zucchini bread recipe has become my go-to snack when I need something quick and delicious. It’s so easy to make, and the result is always incredibly moist and flavorful.” – Jane, keto baking enthusiast
Tips for Perfectly Moist Bread
To ensure that your keto zucchini bread is perfectly moist, there are a few essential tips to keep in mind. Moisture is key to a delightful texture, but you want to avoid any excess liquid that can result in a wet and dense bread. Follow these tips to achieve the perfect balance:
1. Shred and Squeeze
When preparing the zucchini for your bread, make sure to shred it using a grater or food processor. Once shredded, take the extra step of squeezing out the excess liquid. This simple technique helps remove the moisture from the zucchini, preventing it from making your bread soggy.
2. Properly Combine Wet and Dry Ingredients
When mixing the wet and dry ingredients, be careful not to overmix the batter. Overmixing can lead to the development of gluten, resulting in a denser texture. Mix until the ingredients are just combined, ensuring everything is well incorporated without excessive stirring.
“Properly combining the wet and dry ingredients is crucial for a tender and moist texture.”
3. Use a Good Quality Keto-Friendly Flour
Choosing the right flour is essential for achieving moist keto zucchini bread. Opt for a high-quality keto-friendly flour like almond flour, which adds tenderness and moisture to baked goods. Avoid using coconut flour alone as it tends to absorb more liquid and can make the bread dry. If using a blend of flours, ensure they are specifically formulated for low-carb baking.
4. Don’t Overbake
Pay close attention to the baking time and temperature specified in the recipe. Overbaking the bread can result in a dry and crumbly texture. Use a toothpick or cake tester to check for doneness. When inserted into the center of the bread, it should come out with a few moist crumbs clinging to it. Remove the bread from the oven once it reaches this stage to retain its moisture.
5. Store Properly
After baking, allow your keto zucchini bread to cool completely before storing it. Wrap it tightly in plastic wrap or place it in an airtight container to prevent moisture loss. Proper storage will help maintain the bread’s moisture, ensuring it stays deliciously moist for longer.
By following these tips, you can enjoy a perfectly moist and delectable keto zucchini bread every time. Don’t be afraid to experiment with different flavors and add-ins to make it your own!
Adding Extra Flavor and Crunch
You can take your keto zucchini bread to the next level by adding extra flavor and crunch. Consider mixing in walnuts, blueberries, or sugar-free chocolate chips to enhance the taste and texture. However, keep in mind that adding these ingredients might alter the nutrition information, so be mindful of your carb intake.
Adding walnuts to your keto zucchini bread not only adds a delightful crunch but also provides a boost of healthy fats and protein. Walnuts are packed with omega-3 fatty acids, antioxidants, and vitamins, making them a nutritious addition to your bread.
Blueberries, on the other hand, bring a burst of sweetness and a pop of color to the bread. These antioxidant-rich berries are not only low in carbs but also provide numerous health benefits, including improving brain function and supporting heart health.
If you’re a chocolate lover, consider adding some sugar-free chocolate chips to your keto zucchini bread. This indulgent twist will satisfy your cravings without derailing your low-carb lifestyle. Opt for a brand that uses keto-friendly sweeteners like stevia or erythritol.
Experiment with different combinations of these ingredients to create your own unique variations of keto zucchini bread. Whether you prefer a nutty, fruity, or chocolaty flavor profile, adding these extras will add an extra layer of deliciousness to your loaf.
Below is a table summarizing the flavor options and their benefits:
| Ingredients | Benefits |
|---|---|
| Walnuts | – Adds crunch – Provides healthy fats and protein – Rich in omega-3 fatty acids, antioxidants, and vitamins |
| Blueberries | – Adds sweetness and color – Low in carbs – High in antioxidants and beneficial for brain and heart health |
| Sugar-free Chocolate Chips | – Brings indulgence without extra carbs – Suitable for keto diets – Provides a rich chocolate flavor |
Remember that the addition of these flavor boosters may affect the nutritional values of your keto zucchini bread. However, with proper portion control and mindful carb intake, you can still enjoy a delicious and satisfying treat.
Continue reading to learn how to freeze your keto zucchini bread for long-term storage.
Freezing Instructions for Long-Term Storage
If you want to enjoy your freezing keto zucchini bread at a later date, you can easily preserve its freshness and taste by following these simple instructions:
- First, ensure that the bread is completely cooled before freezing to avoid condensation and potential moisture damage.
- Option 1: Wrap the entire loaf of bread tightly in plastic wrap to prevent freezer burn. Then, wrap it again with aluminum foil to provide an extra layer of protection. The double wrapping will help retain moisture and prevent freezer odors from seeping into the bread.
- Option 2: Alternatively, you can slice the keto zucchini bread into individual portions before freezing. This allows for easier thawing and portion control. Wrap each slice separately in plastic wrap, then place them in a freezer-safe container or resealable bag.
Once you have wrapped the bread or individual slices, be sure to label them with the date to keep track of their freezer life. Frozen keto zucchini bread can be stored for up to three months but is best enjoyed within one to two months for optimal taste.
When you’re ready to enjoy your frozen keto zucchini bread, simply follow these thawing instructions:
- Thawing at room temperature: Remove the wrapped bread or individual slices from the freezer and place them on the kitchen counter at room temperature. Allow them to thaw for a few hours or until they reach your desired softness.
- Thawing in the refrigerator: If you prefer a slower thawing process, place the wrapped bread or slices in the refrigerator overnight or for about 8-10 hours. This gentle thawing method helps maintain the bread’s moisture while preventing any rapid temperature changes.
Once the keto zucchini bread is fully thawed, remove the wrapping and enjoy it as you would fresh bread. You can even lightly toast a slice for added warmth and crispness. Remember to store any remaining portions in an airtight container at room temperature to maintain their freshness.
Now that you know how to freeze and thaw your keto zucchini bread, you can bake a batch in advance and have a delicious treat on hand whenever you need it. Whether you’re craving a quick breakfast or a satisfying snack, this long-term storage option ensures that you can enjoy the delightful flavors of keto zucchini bread at your convenience.
Making Zucchini Bread Muffins
If you prefer individual servings, you can easily adapt this recipe to make keto zucchini bread muffins. Simply divide the batter evenly into a muffin tin and bake for a shorter amount of time. This is a great option for portion control and on-the-go snacking.
By making zucchini bread muffins, you can enjoy the delicious flavors of keto zucchini bread in convenient and portable portions. Whether you’re looking for a quick breakfast or a satisfying snack, these muffins are a perfect choice.
To make zucchini bread muffins, follow the same steps as the original recipe for keto zucchini bread. Once the batter is prepared, fill each cavity of a muffin tin with an equal amount of batter. Depending on the size of your muffin tin and desired muffin size, adjust the baking time accordingly.
Here’s a simple table to guide you:
| Muffin Tin Size | Baking Time |
|---|---|
| Standard (12 cavities) | 18-22 minutes |
| Mini (24 cavities) | 14-16 minutes |
Keep an eye on the muffins while baking and use a toothpick to test for doneness. Insert the toothpick into the center of a muffin – if it comes out clean or with a few crumbs, the muffins are ready. Allow them to cool slightly before enjoying or transfer to a wire rack to cool completely.
These zucchini bread muffins are not only delicious, but they also offer portion control, making it easier to stick to your keto diet goals. Feel free to customize your muffins by adding nuts, seeds, or sugar-free chocolate chips to the batter before dividing it into the muffin tin.
Grab a muffin and savor the delightful flavors of keto zucchini bread, conveniently packed in an individual serving. Perfect for busy mornings, afternoon cravings, or whenever you need a quick and nutritious snack.
Other Delicious Bread Recipes to Try
If you’re looking for more delicious bread recipes, you’re in luck! There are several other options to explore, such as 90 Second Keto Bread, Keto Pumpkin Bread, Mexican Cornbread, and Garlic Bread. Each of these recipes offers its own unique flavors and can be enjoyed as part of a low-carb lifestyle.
Expand your culinary horizons with these tasty keto bread recipes:
- 90 Second Keto Bread
- Keto Pumpkin Bread
- Mexican Cornbread
- Garlic Bread
Whether you’re in the mood for a quick and easy bread fix or crave a savory twist, these variations of zucchini bread will satisfy your taste buds while keeping your carb intake in check.
Bread Variations at a Glance
| Recipe | Description |
|---|---|
| 90 Second Keto Bread | A super fast and easy way to make bread in the microwave. |
| Keto Pumpkin Bread | A seasonal delight with warm pumpkin flavors. |
| Mexican Cornbread | A spicy twist on traditional cornbread, perfect for Tex-Mex dishes. |
| Garlic Bread | A savory garlic-infused bread that pairs well with soups and salads. |
Add these recipes to your low-carb repertoire and enjoy the wide variety of flavors and textures that keto bread can offer.
Substitutions and Customizations
You can easily customize this keto zucchini bread recipe to suit your preferences and dietary needs. One of the key aspects of customization is exploring different substitutions for specific ingredients. For instance, if you have an allergy or simply prefer a different flavor profile, you can substitute almond flour with ground sunflower seed meal. This alternative can provide a slightly nuttier taste to your bread while maintaining its low-carb nature.
Tip: Ground sunflower seed meal works great as a 1:1 replacement for almond flour in most recipes.
Additionally, you have the freedom to experiment with various keto sweeteners to achieve your desired level of sweetness. Popular options include erythritol, stevia, or monk fruit sweetener. These alternatives can add a touch of natural sweetness without increasing the carb content of your zucchini bread. Remember to adjust the quantities accordingly, as different sweeteners have varying degrees of potency.
To further enhance the flavor and texture of your keto zucchini bread, consider incorporating add-ins such as chopped walnuts, fresh blueberries, or sugar-free chocolate chips. These additions can provide bursts of flavor and delightful crunches with every bite. However, keep in mind that these add-ins may affect the total carb count, so it’s important to monitor your intake if you’re strictly following a low-carb diet.
Customization Ideas:
- Replace almond flour with ground sunflower seed meal for a different taste.
- Experiment with keto sweeteners like erythritol, stevia, or monk fruit sweetener for varying levels of sweetness.
- Add chopped walnuts, fresh blueberries, or sugar-free chocolate chips to elevate the flavor and texture.
By exploring these substitutions and customizations, you can create a keto zucchini bread that perfectly aligns with your taste preferences and dietary requirements.

Conclusion
In conclusion, keto zucchini bread is a delicious and nutritious option for individuals following a low-carb lifestyle. This delightful bread not only satisfies your bread cravings but also helps you stay on track with your diet goals. Its moist texture and customizable flavor options make it an enjoyable treat that can be incorporated into your daily routine.
By using almond flour and zucchini as the main ingredients, keto zucchini bread provides a low-carb alternative that is both wholesome and satisfying. It’s a perfect way to indulge in the flavors you love without compromising your dietary restrictions. Whether you prefer the added crunch of walnuts, the sweetness of blueberries, or the decadence of chocolate chips, this bread can be customized to suit your taste.
With its easy one-bowl preparation and freezing instructions for long-term storage, keto zucchini bread offers convenience and versatility. You can effortlessly whip up a batch of this bread in a matter of minutes and enjoy it as a quick and satisfying snack. Plus, by freezing the bread, you can always have a keto-friendly treat on hand whenever cravings strike.
Incorporating keto zucchini bread into your low-carb lifestyle allows you to enjoy a guilt-free indulgence while maintaining your health goals. So why wait? Try this easy recipe today and treat yourself to a slice of delicious and nutritious keto zucchini bread!
FAQ
Can I customize the keto zucchini bread recipe?
Yes, you can customize the recipe by adding walnuts, blueberries, or chocolate chips for extra flavor and crunch.
Can I freeze the keto zucchini bread?
Yes, you can easily freeze the bread. Wrap it in plastic wrap and foil, or slice it into individual portions and wrap each one separately. Thaw at room temperature or in the refrigerator before enjoying.
Can I make keto zucchini bread muffins instead?
Yes, you can adapt the recipe to make muffins. Simply divide the batter evenly into a muffin tin and bake for a shorter amount of time.
Are there other bread recipes similar to keto zucchini bread?
Yes, there are several other delicious bread recipes to explore, such as 90 Second Keto Bread, Keto Pumpkin Bread, Mexican Cornbread, and Garlic Bread.
Can I make substitutions in the keto zucchini bread recipe?
Yes, you can substitute almond flour with ground sunflower seed meal for allergies or different flavor profiles. You can also experiment with different keto sweeteners and add-ins to create your own unique variation.
Keto Banana Bread Recipe – Guilt-Free & Tasty!

Are you on a keto diet but still craving that delicious banana bread? Look no further! We have the perfect guilt-free and tasty solution for you. Our keto banana bread recipe is a low-carb alternative to traditional banana bread, allowing you to indulge in a mouthwatering treat while staying on track with your health goals.
Regular banana bread is loaded with sugar and carbs, making it a no-go for most keto enthusiasts. However, with our keto-friendly recipe, you can still savor the flavors you love without any guilt. It’s the perfect blend of moistness, sweetness, and nutrition.
Our keto banana bread recipe is made using wholesome ingredients like ripe bananas, almond flour, eggs, and flavor enhancers like cinnamon and chocolate chips. The combination of these ingredients creates a delectable loaf that will satisfy your craving for banana bread while keeping you in ketosis.
So why wait? Let’s dive into our keto banana bread recipe and get ready to indulge in guilt-free deliciousness!
Key Takeaways:
- Keto banana bread is a low-carb alternative to traditional banana bread.
- It satisfies your cravings while keeping you in ketosis.
- The recipe uses ingredients like ripe bananas, almond flour, and eggs.
- It can be customized with additional flavor enhancers such as cinnamon and chocolate chips.
- Enjoy this guilt-free and tasty treat on your keto diet!
The Ingredients for Keto Banana Bread
To make keto banana bread, you will need the following ingredients:
- Ripe bananas
- Eggs
- Almond flour
- Baking soda
- Olive or coconut oil
- Nuts (optional)
- Flavor enhancers such as cinnamon, honey, and chocolate chips
These ingredients are easily accessible and can be adjusted based on personal preferences. Ripe bananas provide natural sweetness and moisture to the bread, while almond flour serves as a low-carb alternative to regular flour. Baking soda helps the bread rise, and eggs act as a binding agent. Olive or coconut oil adds moisture and healthy fats to the recipe. Nuts can be added for extra crunch and flavor, and flavor enhancers like cinnamon, honey, and chocolate chips can be used to enhance the taste of the bread.
Here’s a simple table summarizing the key ingredients:
| Ingredients | Benefits |
|---|---|
| Ripe bananas | Natural sweetness and moisture |
| Eggs | Binding agent and a source of protein |
| Almond flour | Low-carb alternative to regular flour, provides fiber and healthy fats |
| Baking soda | Helps the bread rise |
| Olive or coconut oil | Provides moisture and healthy fats |
| Nuts (optional) | Adds crunch and additional flavor |
| Flavor enhancers (cinnamon, honey, chocolate chips) | Enhances the taste of the bread |
Now that you know the essential ingredients for keto banana bread, let’s move on to the step-by-step instructions for making this delicious and guilt-free treat.
Step-by-Step Instructions for Keto Banana Bread
Are you ready to create a delicious and guilt-free keto banana bread? Follow these simple step-by-step instructions to enjoy this tasty treat:
- Preheat your oven to 350°F (175°C) and grease a loaf pan.
- In a bowl, combine the dry ingredients: 2 cups of almond flour, 1 teaspoon of baking soda, and a pinch of salt.
- In a separate bowl, whisk 4 eggs.
- Add the whisked eggs to the dry mixture along with 3 mashed ripe bananas, 1/4 cup of olive or coconut oil, and 1 teaspoon of vanilla extract.
- Gently mix everything together until well combined.
- Transfer the batter to the greased loaf pan.
- Add additional toppings for extra flavor, such as banana slices, chopped nuts, and a sprinkle of sugar-free chocolate chips.
- Bake the bread for approximately 40-45 minutes, or until the top is golden brown and a toothpick inserted into the center comes out clean.
- Allow the bread to cool in the pan for 10 minutes, then transfer it to a wire rack to cool completely.
Now, you’re ready to indulge in a slice of keto banana bread heaven. Enjoy it as a breakfast delight or a satisfying snack throughout the day!
This image perfectly captures the mouthwatering appeal of keto banana bread. Just looking at it will make your taste buds tingle with anticipation!
Nutritional Benefits of Keto Banana Bread
While traditional banana bread is high in carbs and sugar, keto banana bread offers numerous nutritional benefits. Let’s take a closer look at the key ingredients that make this guilt-free treat a healthier choice:
Almond Flour
Almond flour, a popular ingredient in keto baking, provides protein, fiber, and essential nutrients. It is also low in carbs compared to regular wheat flour.
Eggs
Eggs are a staple in keto recipes due to their low carbohydrate content and high protein value. They contribute to the structure and texture of the bread without adding unnecessary carbs.
Coconut Oil
Coconut oil, a healthy fat, is widely used in ketogenic cooking. It supports ketosis, the metabolic state that allows the body to burn fat for energy instead of carbohydrates.
Nuts
Nuts, such as walnuts or pecans, can be added to keto banana bread for additional healthy fats. They not only enhance the flavor and texture but also provide essential nutrients.
Compared to the regular version, each slice of keto banana bread contains reduced carbohydrates and sugar, making it a more suitable choice for those following a low-carb lifestyle.
Nutritional Comparison of Regular Banana Bread and Keto Banana Bread
| Nutrients | Regular Banana Bread | Keto Banana Bread |
|---|---|---|
| Carbohydrates | High | Reduced |
| Sugar | High | Reduced |
| Protein | Low | Moderate (due to almond flour and eggs) |
| Fiber | Low | Moderate (due to almond flour) |
| Fat | Low | Higher (due to coconut oil and optional nuts) |
| Essential Nutrients | Minimal | More (due to almond flour and optional nuts) |
By swapping out the traditional ingredients with keto-friendly alternatives, you can enjoy a slice of delicious banana bread while still supporting your dietary goals.
How to Store Keto Banana Bread
Proper storage is essential to keep your keto banana bread fresh and delicious. Unlike regular banana bread, which can be left at room temperature, storing keto banana bread requires specific measures to maintain its quality for longer periods. Follow these storage guidelines to ensure your keto banana bread stays moist and tasty.
1. Refrigeration:
To maintain freshness, it is recommended to store keto banana bread in the refrigerator. The cool temperature will prevent mold growth and keep the bread moist. Simply place your loaf or slices in an airtight container or wrap them tightly with plastic wrap before refrigerating. This method can extend the shelf life of your keto banana bread for up to a week or two.
2. Freezing:
If you want to extend the storage time further, freezing is an excellent option. Keto banana bread can be sliced into individual portions and wrapped in plastic wrap or placed in ziplock bags. Freezing keto banana bread helps preserve its freshness for several months.
Tip: To avoid freezer burn, make sure to wrap each slice tightly and remove any excess air from the ziplock bags before freezing.
To thaw the frozen keto banana bread, simply take out a slice or two and let them defrost at room temperature. Alternatively, you can microwave a frozen slice for a quick and easy snack.
Here’s a visual representation of the recommended storage methods for keto banana bread:
| Storage Method | Duration | Instructions |
|---|---|---|
| Refrigeration | Up to a week or two | Place in an airtight container or wrap with plastic wrap |
| Freezing | Several months | Slice and wrap tightly in plastic wrap or use ziplock bags |
Final Thoughts on Keto Banana Bread
Keto banana bread is a delightful indulgence for anyone following a low-carb lifestyle. It offers a guilt-free way to satisfy cravings for a sweet treat while staying true to your dietary goals. By using keto-friendly ingredients and making a few adjustments to the recipe, you can create a delicious and healthy version of this beloved pastry.
There are numerous recipes available that cater to different dietary preferences and restrictions. Some recipes use natural sweeteners like Stevia, while others incorporate alternative ingredients to reduce carbohydrates. Exploring these variations allows you to find the perfect keto banana bread recipe that suits your taste buds and dietary needs.
Enjoying keto desserts like banana bread is not only a delicious experience but also a way to stay motivated on your low-carb journey. Instead of feeling deprived, you can treat yourself to a nostalgic and mouthwatering dessert that aligns with your health goals. It’s a win-win situation!
Remember, keto-friendly desserts are not limited to just banana bread. There are plenty of options available that allow you to enjoy tasty treats without derailing your low-carb lifestyle. From keto-friendly cookies to decadent cakes, there’s a wide variety of keto desserts to explore and savor.
So, go ahead and experiment with different keto banana bread recipes and other keto-friendly desserts. Treat yourself while nourishing your body with low-carb goodness!
Keto Banana Bread Recipe by Monya Kilian Palmer
Monya Kilian Palmer, the author of the Fats of Life® recipe blog, has crafted a delectable and low-carb keto banana bread recipe. This mouthwatering recipe incorporates almond flour and banana food flavoring to create a moist and flavorful bread that satisfies cravings without derailing a ketogenic lifestyle.
To maintain the keto profile of the recipe, Monya includes ingredients like coconut oil and eggs that align with the low-carb requirements. The result is a scrumptious treat that can be enjoyed guilt-free, even by those following a keto diet.
With Monya’s expertise in creating keto-friendly recipes, she has perfected the balance of flavors and textures in this banana bread. Each slice is rich in taste, offering a delightful experience for anyone looking to indulge in a keto-friendly dessert.
To try Monya Kilian Palmer’s keto banana bread recipe, follow the step-by-step instructions provided in Section 3: Step-by-Step Instructions for Keto Banana Bread and enjoy a satisfying treat that aligns with your low-carb lifestyle.
For more keto recipes and inspiration, visit Monya Kilian Palmer’s Fats of Life® blog.

Image provided by Monya Kilian Palmer’s Fats of Life® blog – Mmm, enjoy a slice of keto banana bread!
Stem and Spoon’s Keto Banana Bread Recipe
Looking for a delicious and guilt-free keto banana bread recipe? Look no further than Stem and Spoon! Their recipe combines low-carb ingredients with natural sweeteners for a sugar-free and flavorful treat.
The key ingredients for this keto banana bread are almond flour, coconut milk, and flax seed meal. Almond flour provides a low-carb alternative to regular flour, while the coconut milk adds moisture and richness to the bread. Flax seed meal adds extra fiber and nutrients.
One of the highlights of Stem and Spoon’s recipe is the use of monk fruit sweetener. This natural sweetener provides sweetness without adding extra carbs or calories. It’s the perfect alternative to traditional sugar.
To make Stem and Spoon’s keto banana bread, simply follow these easy steps:
- Preheat your oven to the specified temperature.
- In a bowl, mix together the almond flour, flax seed meal, baking powder, and a pinch of salt.
- In a separate bowl, whisk together the eggs, coconut milk, monk fruit sweetener, and vanilla extract.
- Gradually add the dry ingredients to the wet ingredients, mixing until well combined.
- Gently fold in the mashed bananas, being careful not to overmix.
- Pour the batter into a greased loaf pan and smooth the top.
- Bake for the specified time, or until a toothpick inserted into the center comes out clean.
- Allow the bread to cool before slicing and serving.
With Stem and Spoon’s keto banana bread recipe, you can enjoy the flavors of traditional banana bread without derailing your low-carb lifestyle. It’s the perfect guilt-free indulgence for any time of day.
So why wait? Try Stem and Spoon’s keto banana bread recipe today and treat yourself to a delicious and healthy twist on a classic favorite!
Tips for Making the Best Keto Banana Bread
When it comes to making keto banana bread, there are a few tips and tricks that can help you achieve the best results. Whether you’re a seasoned baker or just starting out, these tips will ensure your keto banana bread turns out moist, flavorful, and perfectly keto-friendly.
- Choose Ripe Bananas: Opt for ripe bananas that are soft and sweet. They will mash easily and provide maximum flavor to your bread.
- Adjust the Number of Bananas: Depending on your personal preference and desired level of banana flavor, you can adjust the number of bananas in the recipe. If you prefer a stronger banana taste, use more bananas, and if you prefer a milder flavor, use fewer bananas.
- Mix Thoroughly: To ensure even distribution of ingredients, be sure to mix the wet and dry ingredients thoroughly. This will help prevent any pockets of dry flour in the final result.
- Enhance with Toppings: Adding nuts or other toppings to your keto banana bread can enhance both the texture and taste. Consider adding chopped walnuts, pecans, or sugar-free chocolate chips for an extra indulgent twist.
- Avoid Overmixing: Overmixing the batter can result in a dense and rubbery final product. Mix the ingredients just until they are combined to achieve a light and fluffy texture.
By following these tips, you can make the best keto banana bread that is not only delicious but also aligns with your low-carb lifestyle.
Other Keto Bread Options
In addition to keto banana bread, there are other keto-friendly bread options available. These alternatives provide variety and satisfaction while adhering to a low-carb lifestyle. Check out some of the delicious options below:
Soft Keto Buns
If you’re missing bread buns on your keto diet, soft keto buns are a perfect solution. They are fluffy, flavorful, and low in carbs. Made with almond flour and eggs, these buns can be enjoyed with burgers, sandwiches, or as a side to soups and stews.
Olive and Tomato Bread
For a unique twist, try olive and tomato bread. Packed with Mediterranean flavors, this bread combines almond flour, olives, sun-dried tomatoes, and herbs. It’s a savory option that pairs well with cheese or as an accompaniment to Mediterranean-inspired dishes.
Flax Seed Crackers
Craving some crunch? Flax seed crackers are a great keto-friendly snack. These crackers are made with flax seeds, which are rich in healthy fats and fiber. They can be easily customized with additional toppings like sesame seeds, cheese, or herbs.
By including these alternative keto bread options in your low-carb diet, you can enjoy a variety of flavors and textures without compromising your health goals.
Enjoying Keto Desserts Without Ruining Your Diet
Keto desserts provide a delightful way to satisfy your sweet tooth while maintaining a low-carb lifestyle. Whether you’re following the keto diet or simply want to reduce your carbohydrate intake, these guilt-free treats offer a delicious alternative to traditional desserts.
By incorporating alternative ingredients and avoiding high-carb and sugary components, you can create keto-friendly desserts that won’t derail your progress. It’s essential to be mindful of portion sizes and to keep track of your carbohydrate intake to stay in ketosis and continue reaping the benefits of a low-carb diet.
Here are some tips for enjoying keto desserts without compromising your diet:
- Choose low-carb sweeteners: Replace refined white sugar with keto-friendly sweeteners like stevia, erythritol, or monk fruit. These natural sweeteners provide sweetness without the high carbohydrate content.
- Experiment with alternative flours: Traditional flour is high in carbs, but you can swap it with almond flour, coconut flour, or flaxseed meal in your dessert recipes. These low-carb flours add a nutty flavor and an extra dose of nutrients.
- Include healthy fats: Incorporate sources of healthy fats into your desserts, such as coconut oil, avocado, or nuts. These fats not only enhance the flavor and texture but also help you feel satiated.
- Be mindful of portion sizes: While keto desserts can be lower in carbs compared to their conventional counterparts, they still contain calories. Be mindful of your portion sizes to maintain an appropriate calorie intake.
- Get creative with flavors: Experiment with different flavor combinations and spices to add variety to your keto desserts. Cinnamon, vanilla, cocoa powder, and lemon zest can all elevate the taste of your treats without adding extra carbohydrates.
Remember, enjoying keto desserts is about finding a balance. It’s perfectly fine to indulge in a slice of keto-friendly cake or a batch of low-carb cookies occasionally. Just be mindful of your overall carbohydrate intake and ensure these treats fit within your daily macronutrient goals.
Quote:
“With keto desserts, you don’t have to deprive yourself of the joys of indulging in something sweet. By making smart ingredient swaps and keeping track of your macros, you can satisfy your cravings while staying true to your low-carb lifestyle.” – Dr. Sarah Johnson, Keto Lifestyle Expert
So go ahead and explore the world of keto desserts. From keto chocolate mousse to cheesecake, there are endless options to satisfy your sweet tooth while maintaining a low-carb lifestyle. With some creativity and a few adjustments, you can enjoy delicious treats without derailing your diet.
| Dessert | Carbohydrates per Serving | Calories per Serving |
|---|---|---|
| Keto Chocolate Mousse | 5g | 150 |
| Keto Cheesecake | 6g | 200 |
| Low-Carb Brownies | 3g | 180 |
| Almond Flour Cookies | 2g | 120 |
Conclusion
Keto banana bread offers a guilt-free and delicious way to enjoy a classic treat while following a low-carb lifestyle. By using low-carb ingredients and alternative sweeteners, individuals can satisfy their cravings without compromising their dietary goals. With a variety of recipes and adaptations available, it’s easy to find a keto banana bread that suits your taste preferences and nutritional needs.
Whether you prefer the recipe by Monya Kilian Palmer, which incorporates almond flour and banana food flavoring, or the version by Stem and Spoon, which uses coconut milk and flax seed meal, there are options for everyone. These recipes provide moist and flavorful banana bread that keeps you on track with your ketogenic diet.
As you experiment with different recipes, don’t forget to add your personal touch by adding toppings like nuts, cinnamon, or even chocolate chips. These additional flavors can enhance the texture and taste of your keto banana bread. Remember to use ripe bananas and mix the wet and dry ingredients thoroughly for the best results.
Overall, keto banana bread is a fantastic alternative to traditional banana bread. It allows you to enjoy the flavors you love while maintaining a low-carb lifestyle. So go ahead and whip up a batch of this delightful treat. Indulge in every bite, knowing that you’re nourishing your body with a keto-friendly option that satisfies both your taste buds and dietary needs.
FAQ
What is keto banana bread?
Keto banana bread is a low-carb alternative to traditional banana bread that is made using keto-friendly ingredients.
How do I make keto banana bread?
To make keto banana bread, you will need ripe bananas, eggs, almond flour, baking soda, olive or coconut oil, nuts (optional), and flavor enhancers such as cinnamon, honey, and chocolate chips. Preheat your oven, grease your loaf pan, and combine the dry ingredients in a bowl. Whisk the eggs and add them to the mixture along with the mashed bananas and other wet ingredients. Gently mix everything together and transfer the batter to the loaf pan. Bake the bread until the top is golden brown and a toothpick comes out clean. Allow it to cool before serving.
What are the nutritional benefits of keto banana bread?
Keto banana bread offers nutritional benefits such as protein, fiber, and essential nutrients from almond flour, as well as healthy fats from coconut oil and nuts.
How should I store keto banana bread?
Keto banana bread should be stored in the refrigerator to maintain freshness for up to a week or two. It can also be sliced and individually wrapped in ziplock bags for freezing.
Are there other keto bread options available?
Yes, there are other keto-friendly bread options available such as soft keto buns, olive and tomato bread, and flax seed crackers.
Can I enjoy keto desserts like banana bread while following a low-carb diet?
Yes, by using alternative ingredients and avoiding high-carb and sugary components, individuals can enjoy guilt-free keto desserts like banana bread while sticking to their low-carb diet.
Oven-Baked Pork Chops & Roasted Sweet Potatoes

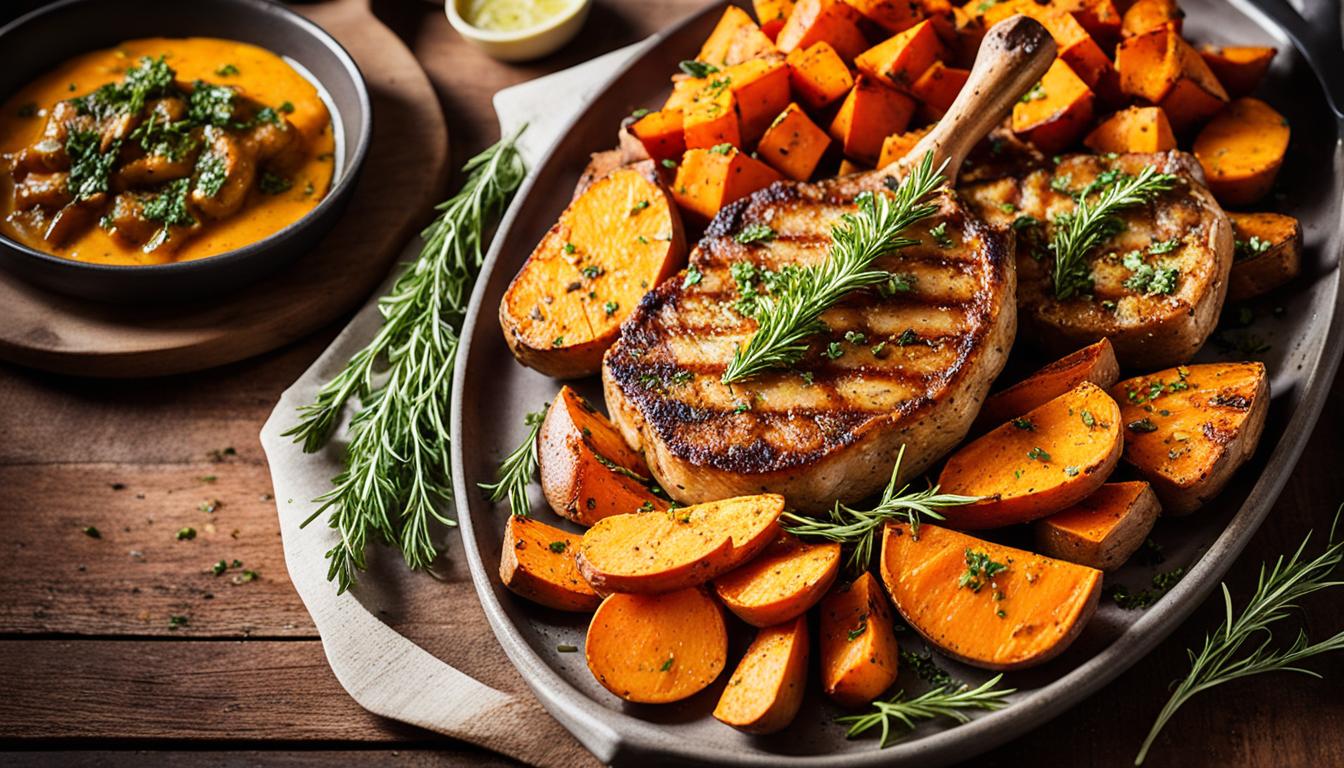
Welcome to our delicious and easy sheet pan meal featuring oven-baked pork chops and roasted sweet potatoes. This mouthwatering recipe combines tender pork chops seasoned with a flavorful spice rub, cooked alongside caramelized sweet potatoes. It’s a one-pan wonder that will satisfy your cravings and simplify your dinner routine.
Key Takeaways:
- Oven-baked pork chops with roasted sweet potatoes is a convenient sheet pan meal.
- This dish is perfect for busy weeknights, providing a complete and satisfying dinner option.
- The pork chops are seasoned with a flavorful spice rub for added taste.
- Roasting the sweet potatoes brings out their natural sweetness and creates tender, caramelized pieces.
- Leftovers can be stored and reheated for future enjoyment.
The Benefits of Sheet Pan Meals
Sheet pan meals have gained immense popularity for their convenience and simplicity. These one-pan wonders offer a range of benefits, making them a go-to option for easy, healthy, and quick clean-up meals.
One of the key advantages of sheet pan meals is their easy preparation. With minimal effort and preparation time, you can have a delicious and satisfying dinner on the table in no time. Simply toss the ingredients onto a sheet pan, pop it in the oven, and let it do the work for you.
Sheet pan meals also promote healthy eating by incorporating a variety of nutritious ingredients. You can easily pack your meal with a colorful array of vegetables, lean proteins, and wholesome grains. The even heat distribution in the oven ensures that the flavors meld together, resulting in a tasty and well-balanced dish.
Another significant advantage of sheet pan meals is the quick clean-up. By using just one pan, you significantly reduce the number of dishes and utensils to wash. This not only saves time but also makes the post-meal clean-up hassle-free, allowing you to spend more time enjoying your meal and less time in the kitchen.
“Sheet pan meals offer the perfect combination of convenience, taste, and nutrition. They are a game-changer for busy individuals and families seeking easy and healthy dinner solutions.”
One example of a delicious sheet pan meal is the oven-baked pork chops with roasted sweet potatoes. This mouthwatering dish combines the savory flavors of seasoned pork chops with the natural sweetness of roasted sweet potatoes, creating a well-rounded and satisfying meal for all.
Spice Rub for Pork Chops
The spice rub used for the pork chops in this recipe adds a delicious burst of flavor. It combines a variety of aromatic ingredients that perfectly complement the natural flavors of the pork chops, creating a savory and mouthwatering coating. Get ready to tantalize your taste buds with the bold and delightful flavors of this spice rub!
Ingredients
- Coconut sugar
- Paprika
- Chili powder
- Thyme
- Rosemary
- Garlic powder
- Kosher salt
- Pepper
Spice Rub Recipe
“The perfect combination of spices transforms ordinary pork chops into a culinary masterpiece.”
| Ingredient | Measurement |
|---|---|
| Coconut sugar | 1 tablespoon |
| Paprika | 1 teaspoon |
| Chili powder | 1 teaspoon |
| Thyme | 1 teaspoon |
| Rosemary | 1 teaspoon |
| Garlic powder | 1 teaspoon |
| Kosher salt | 1/2 teaspoon |
| Pepper | 1/2 teaspoon |
Directions
- In a small bowl, combine all the ingredients for the spice rub.
- Generously coat both sides of the pork chops with the spice rub, gently pressing it into the meat to ensure maximum flavor.
- Cover the pork chops and let them marinate in the refrigerator for at least 30 minutes, or overnight for even more intense flavor.
Now that your spice rub is ready, it’s time to take your pork chops to the next level. The flavorful combination of spices will infuse every bite with a tantalizing taste that will leave you craving more. Get ready to impress your family and friends with these mouthwatering pork chops!
Roasting Sweet Potatoes
Roasting sweet potatoes is a simple and delicious way to cook them. In this recipe, the diced sweet potatoes are drizzled with olive oil, salt, and pepper, then roasted in the oven at 425°F for 15 minutes. The high heat helps to caramelize the edges, resulting in sweet and tender pieces of sweet potato. Roasting intensifies the natural sweetness and brings out the best flavors in the potatoes, making them a perfect complement to the savory pork chops.
Roasted Sweet Potatoes Recipe
- Preheat your oven to 425°F.
- Peel and dice the sweet potatoes into bite-sized pieces.
- Place the sweet potatoes on a sheet pan, and drizzle with olive oil.
- Season with salt and pepper to taste, and toss to coat evenly.
- Spread the sweet potatoes evenly on the sheet pan.
- Roast in the preheated oven for 15 minutes, or until the edges are caramelized and the sweet potatoes are tender.
- Remove from the oven and let cool slightly before serving.
Roasted sweet potatoes are not only delicious, but they also offer a variety of health benefits. They are rich in fiber, vitamins, and minerals, making them a nutritious addition to your meal. Plus, the caramelized edges and tender texture take the flavor profile of sweet potatoes to a whole new level. Whether you’re enjoying them as a side dish or incorporating them into a sheet pan meal like oven-baked pork chops, roasted sweet potatoes are sure to be a crowd-pleaser.
The high heat of roasting sweet potatoes helps to caramelize the edges, resulting in a sweet and tender texture that perfectly complements the savory pork chops. Plus, roasting intensifies the natural sweetness of the potatoes, enhancing their flavor profile.
Cooking Pork Chops and Apples
After the sweet potatoes have roasted for 15 minutes, it’s time to add the delicious combination of pork chops and apples to the sheet pan. To enhance the flavor, coat the pork chops with the irresistible spice rub and place them on the opposite side of the pan from the sweet potatoes.
The diced apples are then added to the sweet potatoes, creating a harmonious medley of flavors. Everything is roasted for an additional 12-15 minutes, or until the sweet potatoes are tender and the pork chops reach an internal temperature just before 145°F. This cooking time ensures perfectly cooked pork chops and tender apples that beautifully complement the dish.
The pork chops and apples create a delightful combination of savory and sweet flavors that will tantalize your taste buds. The natural sweetness of the apples pairs wonderfully with the savory spice rub, resulting in a dish that is both comforting and satisfying.
Leftover Storage and Reheating
After enjoying a delicious meal of oven-baked pork chops with roasted sweet potatoes, you may find yourself with some leftovers. Don’t let these tasty morsels go to waste! With proper storage and reheating techniques, you can savor the flavors of this dish for days to come.
To ensure the longevity of your leftovers, it’s important to store them in an airtight container. This will help maintain their freshness and prevent any odor or taste transfer to other food items in your refrigerator.
Leftovers can be safely stored in the refrigerator for up to five days. This allows you to enjoy the convenience of a ready-made meal whenever you desire.
When it’s time to reheat your leftovers, you have two options: the oven or the microwave.
Using the Oven: Preheat your oven to 350°F (175°C). Place your portion of oven-baked pork chops with roasted sweet potatoes in a baking dish or on a sheet pan. Cover the dish with aluminum foil to prevent the food from drying out. Heat in the oven until the dish is heated all the way through. This method will help retain the flavors and textures of the original meal.
Using the Microwave: For a quick and convenient reheating option, the microwave is your best friend. Simply transfer your leftovers to a microwave-safe dish and cover it with a microwave-safe lid or plastic wrap. Heat the dish on high power in short intervals, checking on the food and stirring occasionally to ensure even heating. Be cautious not to overheat, as this can result in dry and rubbery pork chops.
Regardless of which method you choose, make sure the dish is heated to a safe internal temperature of 165°F (74°C) to eliminate any bacteria that may have grown during storage.
By properly storing and reheating your leftovers, you can continue to enjoy the mouthwatering flavors of oven-baked pork chops with roasted sweet potatoes. So, go ahead and indulge in this delectable meal even on the following days.
| Reheating Method | Instructions |
|---|---|
| Oven | 1. Preheat oven to 350°F (175°C).
2. Place leftovers in a baking dish or on a sheet pan. 3. Cover with aluminum foil. 4. Heat until dish is heated through. 5. Check the internal temperature to ensure it reaches 165°F (74°C). |
| Microwave | 1. Transfer leftovers to a microwave-safe dish.
2. Cover with a microwave-safe lid or plastic wrap. 3. Heat in short intervals on high power, stirring occasionally. 4. Check the internal temperature to ensure it reaches 165°F (74°C). Be cautious not to overheat. |
Nutritional Information
The oven-baked pork chops with roasted sweet potatoes are not only delicious but also provide essential nutrients. Nutritional information for one serving of this dish is as follows:
| Calories | Carbohydrates | Protein | Fat | Fiber | Sugar |
|---|---|---|---|---|---|
| 478 | 33g | 49.5g | 16g | 5.4g | 13.2g |
The nutritional values provided are approximate and may vary depending on the size and thickness of the pork chops used. However, this well-balanced meal offers a good source of energy and essential nutrients.
The oven-baked pork chops with roasted sweet potatoes provide:
- A moderate calorie count of 478 calories per serving.
- 33 grams of carbohydrates for sustained energy.
- A generous 49.5 grams of protein for muscle repair and growth.
- 16 grams of fat, which includes healthy fats.
- 5.4 grams of fiber, aiding digestion and promoting satiety.
- 13.2 grams of sugar, originating from natural sources.
These nutritional values make the oven-baked pork chops with roasted sweet potatoes a well-rounded and satisfying meal option.
Key Nutritional Facts:
- Calories: 478
- Carbohydrates: 33g
- Protein: 49.5g
- Fat: 16g
- Fiber: 5.4g
- Sugar: 13.2g
Enjoy the nutrient-rich benefits of this delicious meal! Fuel your body with the right balance of calories, carbohydrates, protein, and fat for optimal health.
Paleo Variation
For those following a paleo diet, this recipe can be modified to align with paleo principles. Instead of using regular white potatoes, you can opt for sweet potatoes as they are paleo-friendly. The dish can be customized further by using a cauliflower crust for a paleo pizza variation. This allows for a home-style meal that fits within the paleo guidelines while still providing comfort and satisfaction.
Image: Paleo variation of oven-baked pork chops with roasted sweet potatoes.
Make-Ahead and Freezing Options
This oven-baked pork chops with roasted sweet potatoes recipe offers convenient make-ahead and freezing options to streamline your meal preparation. By taking advantage of these options, you can save time and ensure a delicious and hassle-free dining experience.
Make-Ahead Preparation
Making this sheet pan meal ahead of time allows you to be even more efficient in the kitchen. Here’s how you can do it:
- Prepare the Ingredients: Begin by washing, peeling, and cutting the sweet potatoes into cubes. You can also mix the spice rub and marinate the pork chops a day in advance. Keep the marinated pork chops and prepped sweet potatoes in separate airtight containers in the refrigerator.
- Assembly: When you’re ready to cook, simply arrange the marinated pork chops and prepped sweet potatoes on a sheet pan, following the recipe instructions. This way, the assembly process becomes quicker and more convenient.
- Cooking Time: The cooking time remains the same whether you assemble the dish immediately or do it ahead of time.
By preparing the ingredients ahead of time, you can have a satisfying meal on the table with minimal effort and maximum convenience.
Freezing Options
If you have extra portions or want to make a batch for future meals, freezing is a great option to preserve the flavors and convenience of this dish.
Here’s how you can freeze the oven-baked pork chops with roasted sweet potatoes:
- Cooling: Allow the cooked dish to cool completely before freezing to maintain its integrity and prevent ice crystals from forming.
- Portioning: Divide the dish into individual portions based on your preference. This will make it easier to defrost and reheat smaller portions as needed.
- Freezing: Place each portion in airtight containers or freezer-friendly bags, ensuring all excess air is removed to prevent freezer burn.
- Labeling: Label each container or bag with the dish’s name and date of freezing to ensure you use them within the recommended time frame.
- Storage Duration: According to the USDA, this dish can be frozen for up to 3 months for the best quality.
When you’re ready to enjoy your frozen meal, simply defrost it in the refrigerator overnight and reheat it in the oven or microwave following the instructions in Section 6.
With the make-ahead and freezing options offered by this recipe, you can conveniently plan and prepare delicious meals in advance, saving you time and effort in the kitchen while still enjoying the flavors of oven-baked pork chops and roasted sweet potatoes.

Conclusion
Oven-baked pork chops with roasted sweet potatoes is a versatile and satisfying meal that combines the flavors of tender pork chops, caramelized sweet potatoes, and savory spices. This delicious dish offers the convenience of a sheet pan meal, making it easy to prepare and perfect for busy weeknights. The combination of juicy pork chops and tender sweet potatoes creates a harmonious balance of flavors that will please the whole family.
Not only is this meal delicious, but it also provides a balanced nutritional profile. The oven-baked pork chops are a great source of protein, while the roasted sweet potatoes offer a healthy dose of fiber, vitamins, and minerals. This combination of ingredients ensures that you are nourishing your body with a wholesome and satisfying meal.
Furthermore, oven-baked pork chops with roasted sweet potatoes can be customized to suit different dietary preferences. If you follow a paleo lifestyle, you can easily modify the recipe to align with paleo principles. By using sweet potatoes instead of white potatoes and opting for a cauliflower crust, you can enjoy a paleo-friendly version of this home-style dish.
In conclusion, oven-baked pork chops with roasted sweet potatoes is a flavorful and convenient meal that brings together the best of both worlds. Whether you’re looking for a quick and easy weeknight dinner or a satisfying dish that caters to your dietary needs, this recipe is sure to please. So why not give it a try and treat yourself to the deliciousness of oven-baked pork chops and roasted sweet potatoes!
FAQ
How long does it take to cook oven-baked pork chops with roasted sweet potatoes?
The cooking time for this dish is under 30 minutes, making it a quick and convenient option for busy weeknights.
What spices are used in the spice rub for the pork chops?
The spice rub for the pork chops includes ingredients like coconut sugar, paprika, chili powder, thyme, rosemary, garlic powder, kosher salt, and pepper.
How do you cook the sweet potatoes for this recipe?
The sweet potatoes are diced and roasted in the oven at 425°F for 15 minutes, resulting in sweet and tender pieces with caramelized edges.
How do you cook the pork chops and apples?
The pork chops are coated with the spice rub and placed on the sheet pan, alongside diced apples. Everything is roasted for an additional 12-15 minutes until the sweet potatoes are tender and the pork chops reach the desired temperature.
Can I store and reheat leftovers of this dish?
Yes, you can store leftovers in an airtight container for up to 5 days. To reheat, you can use either the oven or the microwave.
What are the nutritional values of this dish?
One serving of this dish contains approximately 478 calories, 33g of carbohydrates, 49.5g of protein, and 16g of fat. The meal also provides 5.4g of fiber and 13.2g of sugar.
Is this recipe suitable for those following a paleo diet?
Yes, the recipe can be modified to align with paleo principles by using paleo-friendly ingredients like sweet potatoes and cauliflower crust.
Can I make this dish ahead of time or freeze it?
Yes, you can prepare the ingredients ahead of time and marinate the pork chops in advance. The dish can also be frozen for up to 3 months.
What are the benefits of sheet pan meals?
Sheet pan meals offer easy preparation, healthy ingredients, and quick clean-up, making dinner time easier and more enjoyable.
What makes oven-baked pork chops with roasted sweet potatoes a versatile meal?
This dish combines the flavors of tender pork chops, caramelized sweet potatoes, and savory spices. It can be customized to suit different dietary preferences and still provides comfort and satisfaction.
Keto Comfort: Canned Salmon Fish Cakes

For exclusive access and deals, visit here.
Try our
Keto-Friendly Chicken Alfredo with Protein Sparing Noodles
Share this post:
Share onTwitter Share onFacebook Share onPinterest Share onLinkedIn Share onEmail
Keto Fusion Delight: Creamy Sun-Dried Tomato Chicken Zoodles
For exclusive access and deals, visit here.
Try our
Keto-Friendly Chicken Alfredo with Protein Sparing Noodles
Share this post:
Share onTwitter Share onFacebook Share onPinterest Share onLinkedIn Share onEmail
Keto Delight: Pork Tenderloin with Zucchini Salad
For exclusive access and deals, visit here.
Try our
Keto-Friendly Chicken Alfredo with Protein Sparing Noodles
Share this post:
Share onTwitter Share onFacebook Share onPinterest Share onLinkedIn Share onEmail
Elevate Celebrations: 15 Paleo Keto Gifts for Every Budget

For exclusive access and deals, visit here.
Try our
Keto-Friendly Chicken Alfredo with Protein Sparing Noodles
Share this post:
Share onTwitter Share onFacebook Share onPinterest Share onLinkedIn Share onEmail
Keto Delight: Creamsicle Cupcakes to Satisfy Your Sweet Cravings

For exclusive access and deals, visit here.
Try our
Keto-Friendly Chicken Alfredo with Protein Sparing Noodles
Share this post:
Share onTwitter Share onFacebook Share onPinterest Share onLinkedIn Share onEmail
Spice Up Your Keto Cuisine: One-Pan Spicy Harissa Chicken and Veggies

For exclusive access and deals, visit here.
Try our
Keto-Friendly Chicken Alfredo with Protein Sparing Noodles
Share this post:
Share onTwitter Share onFacebook Share onPinterest Share onLinkedIn Share onEmail
Elevate Your Keto Dining Experience: Balsamic Grilled Chicken with Greek-Style Salad
For exclusive access and deals, visit here.
Try our
Keto-Friendly Chicken Alfredo with Protein Sparing Noodles
Share this post:
Share onTwitter Share onFacebook Share onPinterest Share onLinkedIn Share onEmail
Revitalize Your Health with 3 Easy Apple Cider Vinegar Wellness Shots
For exclusive access and deals, visit here.
Try our
Keto-Friendly Chicken Alfredo with Protein Sparing Noodles
Share this post:
Share onTwitter Share onFacebook Share onPinterest Share onLinkedIn Share onEmail
Elevate Your Keto Experience with Flavorful Beef Stew and Cauliflower Mash

For exclusive access and deals, visit here.
Try our
Keto-Friendly Chicken Alfredo with Protein Sparing Noodles
Share this post:
Share onTwitter Share onFacebook Share onPinterest Share onLinkedIn Share onEmail
Optimizing Keto Dining: Indulge in Creamy Tuscan Zucchini Noodles with Sausage

For exclusive access and deals, visit here.
Try our
Keto-Friendly Chicken Alfredo with Protein Sparing Noodles
Share this post:
Share onTwitter Share onFacebook Share onPinterest Share onLinkedIn Share onEmail
Keto Pressure Cooker Pot Roast: A Flavorful Low-Carb Delight

For exclusive access and deals, visit here.
Try our
Keto-Friendly Chicken Alfredo with Protein Sparing Noodles
Share this post:
Share onTwitter Share onFacebook Share onPinterest Share onLinkedIn Share onEmail
Culinary Delight: Keto Chicken and Asparagus with Italian Dressing
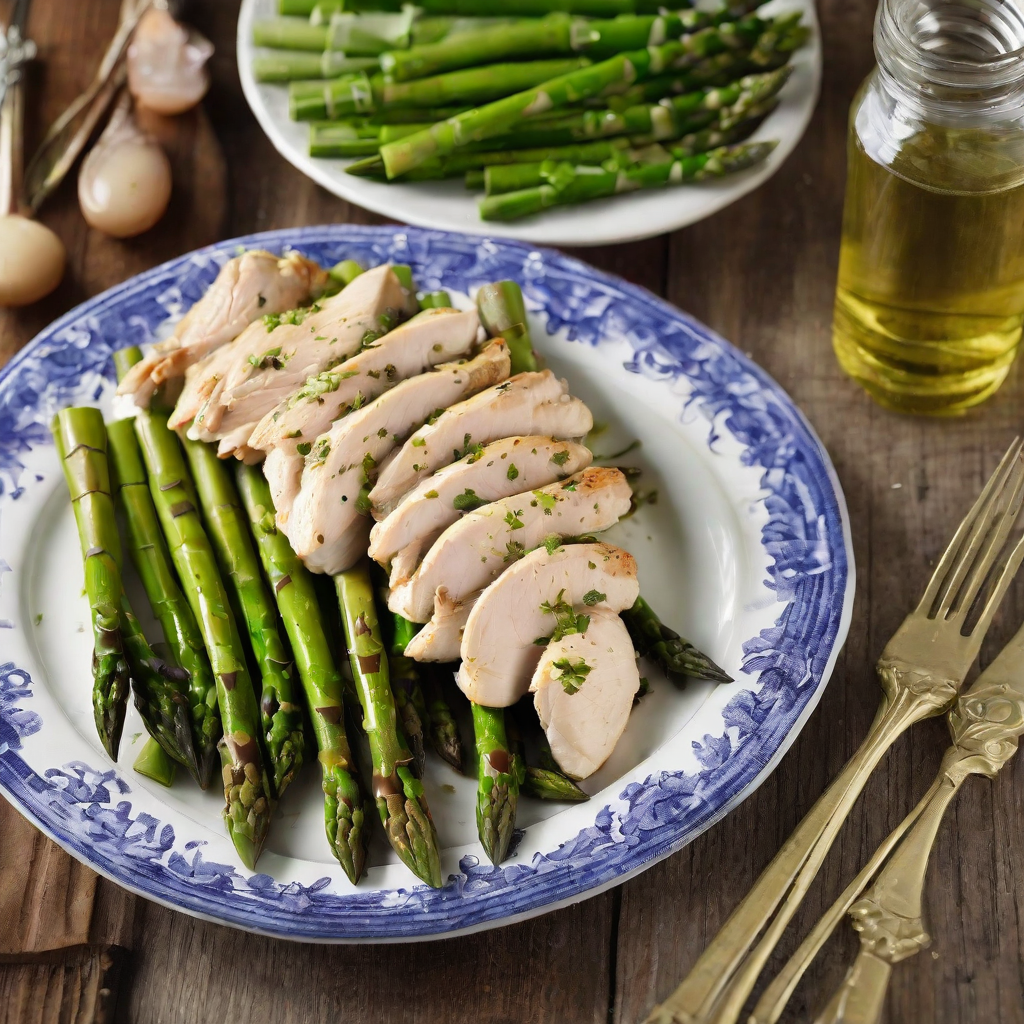
For exclusive access and deals, visit here.
Try our
Keto-Friendly Chicken Alfredo with Protein Sparing Noodles
Share this post:
Share onTwitter Share onFacebook Share onPinterest Share onLinkedIn Share onEmail
Elevate Your Paleo Experience: 43 Healthy and Hearty Paleo Soups
For exclusive access and deals, visit here.
Try our
Keto-Friendly Chicken Alfredo with Protein Sparing Noodles
Share this post:
Share onTwitter Share onFacebook Share onPinterest Share onLinkedIn Share onEmail